I figured making cute Halloween monster cake pops would be a straightforward, thirty-minute affair involving melted chocolate and a little bit of candy. It took about an hour of staring at a lopsided blob of cake batter before that assumption fell apart completely. Honestly, I had envisioned a neat row of smiling ghosts and friendly green monsters, ready to be handed out to trick-or-treaters with minimal stress. What I actually ended up with was a kitchen that looked like a candy explosion, a bowl of frosting that was way too runny, and a single, sad cake pop that looked more like a depressed potato than a spooky monster.
The reality of cake pops is that they are less about baking and more about structural engineering with sugar. You know how it goes—you bake the cake, crumble it up, mix it with frosting, and then try to roll it into perfect spheres while resisting the urge to eat half of it raw. The first few attempts always fail. The sticks fall out. The chocolate cracks. You start questioning your life choices and whether it would be easier to just buy a box of cookies from the store. But then, you get one right. Just one. And suddenly, the mess makes sense.
This specific batch was born out of desperation during a last-minute party prep. I needed something that looked impressive but didn’t require actual baking skills on the day of the event. I wanted these cute Halloween monster cake pops to be the star of the show, something that would make kids giggle and adults take photos for their social media feeds. The contrast between my initial panic and the final result was stark. What started as a chaotic mess of sprinkles and failed spheres turned into a batch of adorable, edible monsters that vanished in minutes.
There is something deeply satisfying about taking simple ingredients—cake, frosting, candy—and turning them into characters. It’s not just about feeding people; it’s about creating a tiny bit of magic. When you see a little purple monster with googly eyes staring back at you, you forget about the burnt edges of the cake or the time you spent wiping chocolate off your forehead. You just smile. That’s the secret. It’s not about perfection. It’s about the fun of making something that looks silly and tastes like comfort. And honestly, that’s the best kind of cooking there is.
Why You’ll Love This Recipe
Let’s be real for a second. Most people think cake pops are just fancy cupcakes with sticks. They aren’t. They are a different beast entirely, and once you nail the technique, you’ll never look at a cupcake the same way again. This recipe isn’t just about slapping candy on a ball of cake; it’s about creating a texture that melts in your mouth and a design that actually holds its shape. I’ve tested this method through multiple Halloween seasons, and here is why it works every single time.
* **Quick & Easy Prep:** While rolling them takes a bit of patience, the actual assembly is surprisingly fast. Once you have your cake crumbs ready, you can batch-process these in no time. They are perfect for busy weeknights or those frantic Sunday-afternoon prep sessions before the party.
* **Simple Ingredients:** You likely have everything you need already. Cake mix, frosting, and candy melts are pantry staples for many, and even if you don’t, they are cheap and easy to find. No fancy grocery trips needed.
* **Perfect for Halloween Parties:** Whether it’s a classroom party, a trick-or-treat hostess gift, or just a late-night snack, these cute Halloween monster cake pops fit the bill. They are festive without being overly complicated.
* **Crowd-Pleaser:** Kids love the novelty of eating a character. Adults love the nostalgia. I’ve served these at office Halloween parties, and they always disappear before the main dessert is even cut.
* **Unbelievably Delicious:** The texture is key. By using a dense, moist cake base and rich frosting, you get a bite that is rich but not overwhelming. It’s the kind of sweet treat that feels indulgent but stays light enough to finish the whole thing.
What makes this recipe different from the rest is the attention to the “monster” aspect. Many recipes just tell you to dip them in red or orange. This method encourages you to get creative with the colors and shapes. You aren’t just making a cake pop; you are building a tiny friend. Whether it’s a one-eyed monster, a wobbly ghost, or a striped skeleton, the creative freedom is what makes this recipe stick. It’s not just food; it’s a craft project you can eat. And let’s face it, we all need more craft projects we can eat.
What Ingredients You Will Need
This recipe relies on simple, wholesome ingredients to deliver bold flavor and satisfying texture without the fuss. The magic happens in the ratio of cake to frosting, so getting the right components is crucial. You want ingredients that bind well and hold their shape when chilled. Most of these are standard baking staples, but a few specific choices will make your life much easier.
* **For the Cake Base:**
* One 15.25-ounce box of yellow or white cake mix (I recommend Betty Crocker for a neutral flavor that doesn’t overpower the candy)
* Three large eggs, room temperature
* One-third cup vegetable oil
* One cup water
* *Note: You can use homemade vanilla cake batter if you prefer, but box mix ensures consistency for beginners.*
* **For the Binding Frosting:**
* One cup of your favorite frosting (vanilla or cream cheese works best; store-bought is fine and saves time)
* *Tip: If your frosting is very sweet, consider using unsweetened cocoa powder to balance it out.*
* **For the Coating & Decoration:**
* Two 12-ounce bags of candy melts (white, black, orange, purple, and green for the monsters)
* One package of mini chocolate chips (for eyes and details)
* One bag of mini marshmallows (for teeth or bodies)
* One box of candy eyes (various sizes for different monster looks)
* One bag of sprinkles (jimmies or nonpareils for texture)
* Lollipop sticks (pre-waxed is essential to prevent sticking)
* *Substitution: You can use real chocolate instead of candy melts, but it requires tempering and doesn’t set as hard. Candy melts are much more forgiving for beginners.*
* **Optional Add-ins:**
* Food coloring gel (if you want to tint the frosting for a specific monster theme)
* Edible glitter (for a spooky shimmer)
The key here is quality. Don’t skimp on the candy melts. Cheap brands often have a waxy texture and don’t dip smoothly. Look for brands like Wilton or Ghirardelli for the best results. Also, ensure your cake is completely cooled before crumbling. Warm cake will melt the frosting and create a soggy mixture that won’t roll properly. This attention to detail is what separates a good cake pop from a great one.
Equipment Needed
You don’t need a professional kitchen to make these cute Halloween monster cake pops, but having the right tools will save you a lot of headache. Here is what you’ll need to get started.
* **Muffin Tin:** A standard 12-cup muffin tin is essential for holding the cake pops while they set. It keeps them upright and prevents them from rolling away.
* **Large Mixing Bowl:** You need enough space to crumble the cake and mix it with the frosting. A bowl with a wide mouth is easier to work with.
* **Pastry Brush or Paper Towel:** This is for brushing off excess crumbs before dipping. It sounds minor, but it makes a huge difference in the final look.
* **Microwave-Safe Bowls:** You’ll need at least three or four small bowls for melting different colors of candy melts. Make sure they are microwave-safe and easy to stir in.
* **Offset Spatula:** This helps you spread the melted chocolate evenly over the cake balls. A regular spatula can work, but an offset one gives you more control.
* **Parchment Paper:** Line your muffin tin with parchment liners or just a sheet of parchment paper. This makes cleanup a breeze.
* **Aluminum Foil:** Wrap the handles of the lollipop sticks with foil to keep your hands clean while dipping. It’s a small trick that prevents chocolate from getting on your fingers.
If you don’t have an offset spatula, a butter knife can work in a pinch. For the muffin tin, if you don’t have one, you can use a block of foam covered in foil to stick the pops into, but the tin is much more stable. Budget-friendly options are key here, so don’t feel the need to buy new equipment unless you plan to make these often. Most of these items are likely already in your kitchen.
Preparation Method
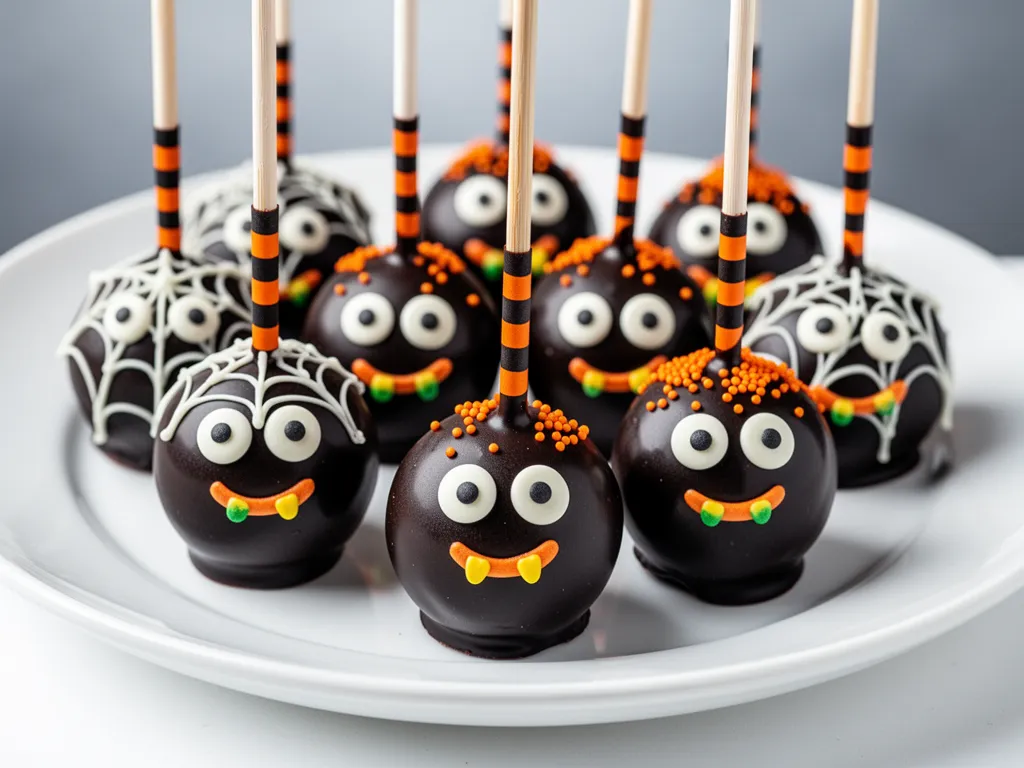
Making these cute Halloween monster cake pops is a process of layers. You build the base, you chill it, you coat it, and then you decorate. Follow these steps closely for the best results.
1. **Bake the Cake:** Preheat your oven to 350°F (175°C). Prepare the cake mix according to the package directions. Pour the batter into a lined 9×13 inch baking pan. Bake for 20-25 minutes, or until a toothpick inserted in the center comes out clean. Let the cake cool completely in the pan. This step is crucial; if the cake is warm, it will turn into mush when you mix it with frosting.
2. **Crumble the Cake:** Once the cake is cool, remove it from the pan and place it in a large bowl. Use your hands or a fork to crumble the cake into fine crumbs. Aim for a texture similar to wet sand. Remove any large chunks or uneven pieces. This ensures a uniform texture for your cake pops.
3. **Mix with Frosting:** Add the cup of frosting to the cake crumbs. Start with half a cup and mix. Add more if the mixture is too dry. You want the mixture to hold together when squeezed but not be so wet that it slides off your fingers. This usually takes about 5-10 minutes of mixing by hand.
4. **Roll the Balls:** Scoop out about 1.5 tablespoons of the mixture and roll it into a ball between your palms. Try to keep them uniform in size. Place them on a parchment-lined baking sheet. As you roll, you might find the mixture gets sticky. Keep your hands lightly dusted with powdered sugar or wet with a little water to prevent sticking. You should get about 24-30 cake balls.
5. **Chill the Balls:** Place the baking sheet with the cake balls in the freezer for 30 minutes. This step is non-negotiable. Chilling firms up the fat in the frosting and cake, making them sturdy enough to handle the dipping process without falling apart.
6. **Prepare the Sticks:** Melt a small amount of your chosen candy melt color in a microwave-safe bowl. Dip the tip of each lollipop stick into the melted candy, then insert it into the center of a chilled cake ball. Twist slightly to secure. This acts as the glue that holds the stick in place.
7. **Dip the Cake Pops:** Melt the remaining candy melts in 30-second intervals, stirring in between, until smooth. Hold a cake pop by the stick and dip it into the melted candy, swirling it to coat evenly. Tap the stick gently against the side of the bowl to remove excess candy.
8. **Decorate Immediately:** While the coating is still wet, add your decorations. Press on candy eyes, chocolate chip details, or sprinkles. If you are making monsters, this is where you add ears, horns, or stripes. Work quickly, as the candy sets fast.
9. **Set the Pops:** Place the decorated cake pops back into the muffin tin or a foam block. Let them sit at room temperature until the coating is completely hard. This usually takes about 15-20 minutes. Do not refrigerate them yet, as condensation can ruin the coating.
Cooking Tips & Techniques
There are a few tricks of the trade that I’ve learned through trial and error. These tips will help you avoid the common pitfalls that plague even experienced bakers.
* **Temperature Control:** The biggest mistake people make is not chilling the cake balls enough. If you skip the freezer step, the cake will crumble off the stick when you dip it. Trust the process. Let them freeze for the full 30 minutes.
* **Consistency of Melts:** When melting candy, do not overheat it. If the candy gets too hot, it will seize up and become grainy. If this happens, add a teaspoon of vegetable oil to smooth it out. Stir constantly while melting to ensure even heat distribution.
* **Dipping Technique:** When dipping, submerge the cake ball completely. Don’t just dip the bottom. You want a full coat to seal in the cake and prevent it from drying out. Tap off the excess gently; don’t shake it like a wet umbrella.
* **Troubleshooting Cracks:** If your cake pops crack after dipping, it’s usually because they were too cold. Let them sit at room temperature for 10 minutes after taking them out of the freezer before dipping. The thermal shock causes cracks.
* **Working in Batches:** Don’t try to dip all 30 cake pops at once. Melt enough candy for about 5-6 pops at a time. This ensures the candy stays fluid and easy to work with. If the candy thickens, re-melt it briefly.
* **Personal Tip:** I always keep a bowl of warm water nearby. If my hands get sticky while rolling the cake balls, I dip them in the water for a second. This keeps the mixture from sticking to my skin and makes the rolling process much smoother.
Variations & Adaptations
While the classic cute Halloween monster cake pops are fun, there are plenty of ways to customize them. Here are a few variations I’ve tried that work well.
* **Flavor Twist:** Instead of yellow cake, try red velvet for a spooky red monster look. Or use chocolate cake for a richer flavor. You can also add a teaspoon of pumpkin spice to the batter for a fall-themed twist.
* **Dietary Adjustments:** For a gluten-free option, use a gluten-free cake mix and ensure your frosting and candy melts are certified gluten-free. For a vegan version, use a vegan cake mix and dairy-free frosting. The technique remains the same.
* **Color Variations:** Don’t limit yourself to Halloween colors. You can make these for any occasion. Pink and white for Valentine’s Day, green and purple for St. Patrick’s Day, or any color scheme you like. The monster shapes can be adapted to fit the theme.
* **Texture Changes:** Add crushed cookies to the cake mixture for extra crunch. Oreo crumbs mixed with vanilla frosting create a classic “cookie dough” flavor profile that is always a hit.
* **Personal Variation:** I once tried adding a layer of peanut butter inside the cake ball before dipping it in chocolate. It was a bit messy to assemble, but the flavor combination was incredible. If you’re feeling adventurous, try adding a small dollop of jam or nut butter to the center of the cake ball before rolling it.
Serving & Storage Suggestions
These cute Halloween monster cake pops are best served at room temperature. Cold cake pops can taste waxy, so let them sit out for 10-15 minutes before serving. They pair well with a glass of cold milk or a cup of coffee. For a party setting, place them in a tiered stand or a decorative bowl lined with tissue paper.
To store them, keep them in an airtight container at room temperature for up to 5 days. Do not refrigerate them unless your kitchen is very hot and humid, as the cold can cause condensation and make the coating sticky. If you need to store them longer, you can freeze them. Place them in a single layer in a freezer-safe container, then thaw at room temperature before serving. The flavor actually develops over the first day, so they often taste better on day two.
Nutritional Information & Benefits
Each cake pop contains approximately 150-200 calories, depending on the size and decorations. They are a source of carbohydrates from the cake and sugar from the candy coating. While they are a treat, they can be part of a balanced diet when enjoyed in moderation. The cake provides some energy, and the frosting adds richness. For those with dietary restrictions, remember to check the labels of your ingredients for allergens like gluten, dairy, or nuts. These cake pops are not suitable for those with severe allergies unless you use certified allergen-free ingredients.
Conclusion
Making cute Halloween monster cake pops is a fun, creative, and delicious way to celebrate the season. It’s not about perfection; it’s about the joy of making something special. I hope this guide helps you create your own batch of adorable monsters. Feel free to customize the colors and shapes to suit your own style. If you try this recipe, I’d love to see your creations. Share your photos and let me know how they turned out. Happy baking, and enjoy every bite of your spooky treats!
FAQs
Can I make cake pops ahead of time?
Yes, you can make them up to 5 days in advance. Store them in an airtight container at room temperature. For longer storage, freeze them for up to 3 months.
Why did my cake pops crack?
Cracking usually happens because the cake balls were too cold when dipped. Let them sit at room temperature for 10-15 minutes after chilling to reduce thermal shock.
Can I use homemade frosting?
Yes, but make sure it is thick and not too runny. A stiff buttercream or cream cheese frosting works best. Avoid whipped frostings as they are too airy and won’t bind the cake well.
How do I keep the sticks from falling out?
Dip the tip of the stick into melted candy before inserting it into the cake ball. This acts as glue. Also, make sure the cake balls are firm and cold before inserting the sticks.
What can I use instead of candy melts?
You can use real chocolate, but it requires tempering to set properly. If you don’t want to temper, add a teaspoon of coconut oil to the chocolate to help it set smoother, though it won’t be as hard as candy melts.
Pin This Recipe!
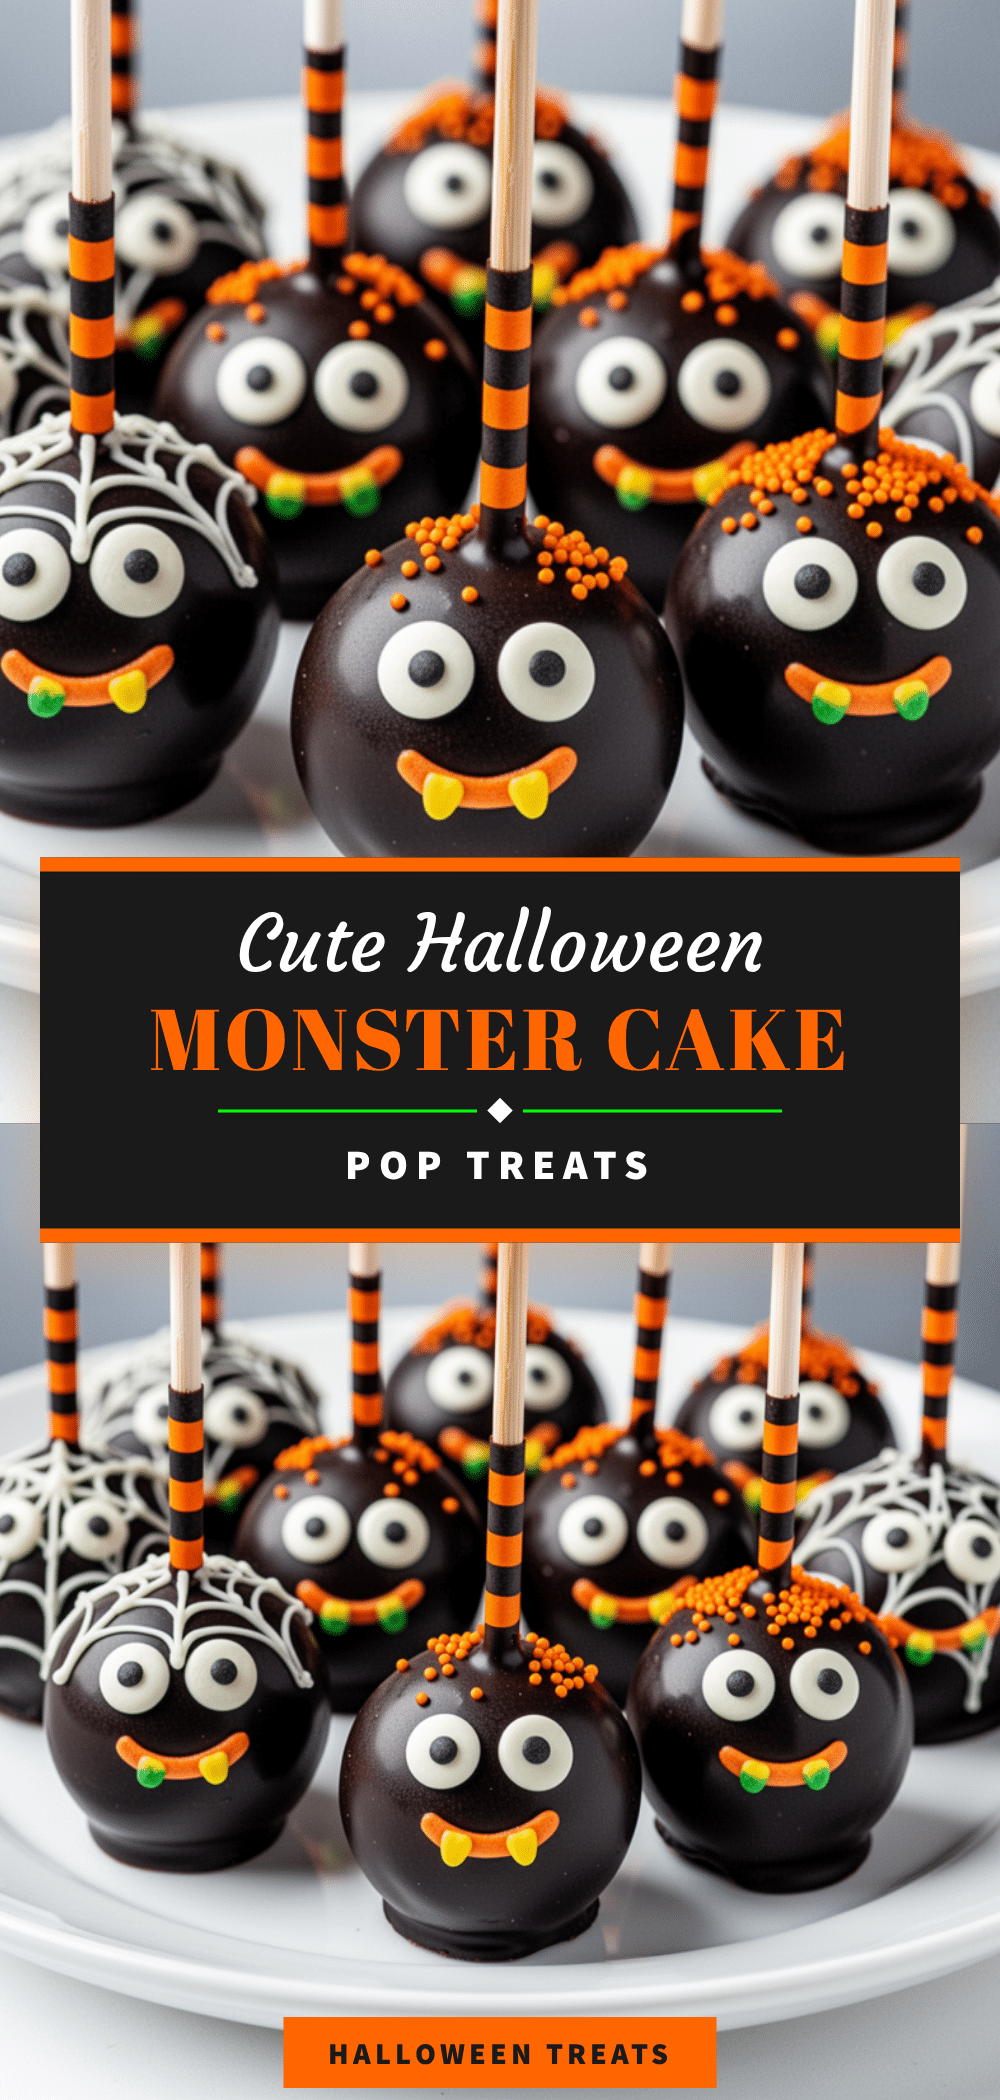
Cute Halloween Monster Cake Pops
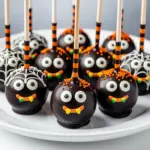
A fun and creative recipe for Halloween-themed cake pops that combine simple ingredients like cake mix and frosting with colorful candy melts to create adorable monster shapes.
- Prep Time: 30 minutes
- Cook Time: 25 minutes
- Total Time: 55 minutes
- Yield: 24-30 servings 1x
- Category: Dessert
- Cuisine: American
Ingredients
- 15.25-ounce box of yellow or white cake mix
- 3 large eggs, room temperature
- 1/3 cup vegetable oil
- 1 cup water
- 1 cup vanilla or cream cheese frosting
- 2 (12-ounce) bags candy melts (white, black, orange, purple, green)
- 1 package mini chocolate chips
- 1 bag mini marshmallows
- 1 box candy eyes (various sizes)
- 1 bag sprinkles (jimmies or nonpareils)
- Lollipop sticks (pre-waxed)
- Powdered sugar or water (for dusting hands)
- Vegetable oil (for smoothing seized candy)
Instructions
- Preheat oven to 350°F (175°C). Prepare cake mix according to package directions and bake in a lined 9×13 inch pan for 20-25 minutes until a toothpick comes out clean.
- Let the cake cool completely in the pan.
- Crumble the cooled cake into fine crumbs in a large bowl, removing any large chunks.
- Mix in 1 cup of frosting, starting with half a cup and adding more if needed until the mixture holds together when squeezed but isn’t too wet.
- Roll the mixture into 1.5 tablespoon balls (yielding 24-30 balls) and place them on a parchment-lined baking sheet.
- Freeze the cake balls for 30 minutes to firm them up.
- Melt a small amount of candy melt and dip the tip of each lollipop stick into it, then insert into the center of a chilled cake ball, twisting slightly to secure.
- Melt remaining candy melts in 30-second intervals, stirring until smooth.
- Dip each cake pop into the melted candy, swirling to coat evenly, and tap off excess.
- Immediately decorate with candy eyes, chocolate chips, marshmallows, or sprinkles while the coating is wet.
- Place decorated pops in a muffin tin or foam block and let set at room temperature for 15-20 minutes until hard.
Notes
Ensure the cake is completely cooled before crumbling to prevent a soggy mixture. Do not skip the freezing step, as it prevents the cake pops from falling apart during dipping. If candy melts seize up, add a teaspoon of vegetable oil to smooth them out. Let cake pops sit at room temperature for 10-15 minutes before serving to avoid a waxy texture.
Nutrition
- Serving Size: 1 cake pop
- Calories: 175
- Sugar: 18
- Sodium: 150
- Fat: 8
- Saturated Fat: 4
- Carbohydrates: 25
- Fiber: 1
- Protein: 2
Keywords: Halloween, cake pops, monster cake pops, easy dessert, party treats, candy melts, kids baking