The craving hits right when the kickoff whistle blows. I want something salty, cheesy, and messy enough to eat with my hands without stopping the game. Honestly, the idea of spending twenty minutes stirring a pot of chili while the first quarter is on feels like a mistake. I have all the chips. I have the cheese. But I’m missing the specific crunch of pickled jalapeños and that tangy sour cream drizzle. It’s a logistics problem, not a cooking problem.
Building a nacho bar solves this instantly. You know how it goes—the team is down by ten, and suddenly everyone is hungry. A single platter gets devoured in seconds, leaving everyone frustrated. But a bar? That’s a buffet. It’s interactive. It lets you control your own destiny, one chip at a time. I learned this the hard way after a Super Bowl party where I made one giant tray. It was cold in the middle by the time we got to it. Never again.
This loaded nacho bar for game day changes the entire dynamic. It’s not just food; it’s an event. Guests mill around, picking their favorites. The quiet ones get the guacamole. The loud ones go for the hot salsa. It’s chaotic in the best way. Plus, you can keep the components warm in separate dishes, so nothing gets soggy until it hits your plate.
I started doing this a few years ago, and it’s become my go-to strategy. It takes the pressure off me to be the chef. I’m just the host. And let’s face it, that’s how it should be on game day. You want to enjoy the game, not stand over a stove. This method ensures everyone eats hot, fresh food, and you actually get to watch the match. It’s practical, it’s delicious, and it’s surprisingly easy to pull off.
Why You’ll Love This Recipe
Why This Loaded Nacho Bar for Game Day Wins Every Time
- Quick & Easy Setup: The prep happens before the game starts. Once the TV is on, you just assemble. It’s perfect for busy weeknights or last-minute cravings when you need to feed a crowd fast.
- Simple Ingredients: No fancy grocery trips needed. You likely already have chips, cheese, beans, and salsa in your pantry. It relies on staples that are easy to find and affordable.
- Perfect for Game Day: This is the ultimate tailgate or living room snack. It scales up easily for large parties or stays small for a cozy movie night.
- Crowd-Pleaser: Always gets rave reviews from kids and adults alike. Even the pickiest eaters find something they like on the bar.
- Unbelievably Delicious: The texture and flavor combo is next-level comfort food. You get the crunch of the chip, the goo of the cheese, and the fresh kick of veggies all in one bite.
What makes this recipe different from the rest? It’s the separation of wet and dry ingredients. Most nacho recipes fail because the chips get soggy too quickly. By keeping the toppings in separate bowls, you maintain that crucial crunch until the moment of truth. It’s a simple technique, but it changes everything. This isn’t just another version—it’s your best version because it respects the texture of the chip.
Connect emotionally by tapping into the why. This recipe isn’t just good—it’s the kind that makes you close your eyes after the first bite. It’s comfort food reimagined—healthier, faster, but with the same soul-soothing satisfaction. Perfect for impressing guests without stress, or turning a simple meal into something memorable. You’ll love how it brings people together around the table, or rather, around the spread.
What Ingredients You Will Need
This recipe uses simple, wholesome ingredients to deliver bold flavor and satisfying texture without the fuss. The magic lies in the variety, not complexity. You want a mix of textures: crunchy chips, creamy dips, and crunchy toppings. Here is what you need to build the ultimate bar.
For the Base
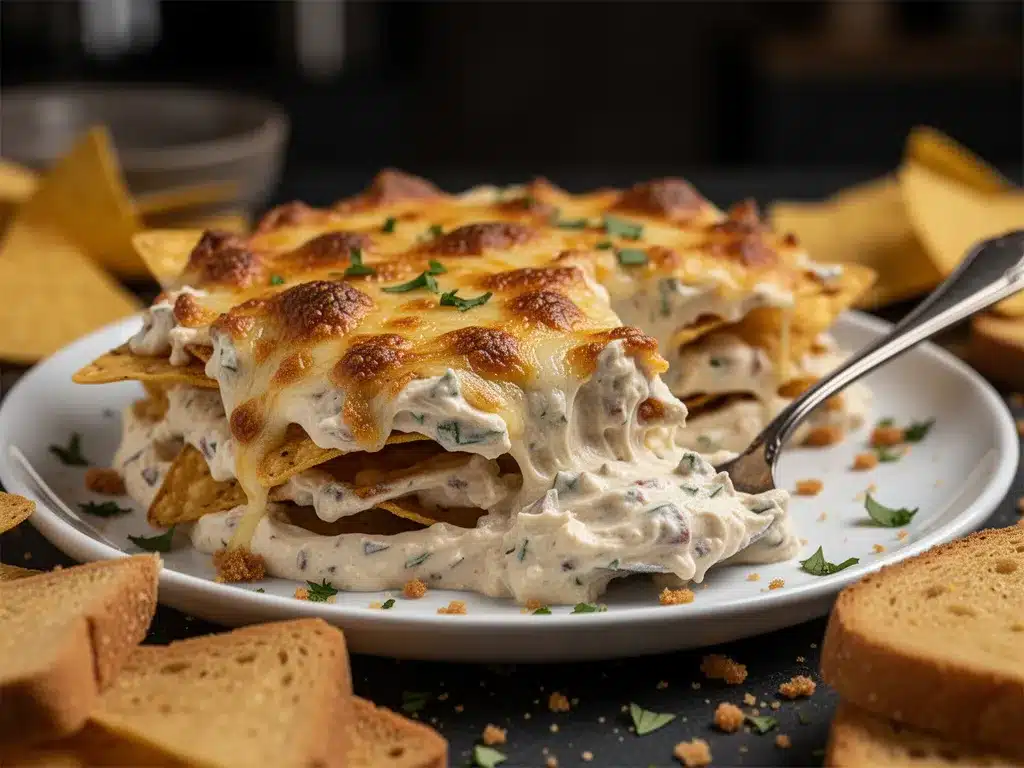
- Restaurant-style tortilla chips: Thick, sturdy, and golden. Look for brands like Old El Paso or generic store brands that are labeled “restaurant style” for the best structural integrity. (Avoid thin chips; they break under the weight.)
- White corn tortilla chips: For a gluten-free option and a slightly sweeter, earthier flavor profile.
- Blue corn tortilla chips: Adds a nice visual contrast and a nutty taste.
For the Cheese & Beans
- Shredded Mexican blend cheese: Pre-shredded is fine for speed, but block cheese melts better. If you shred it yourself, add a little cornstarch to prevent clumping. (Adds richness and gooeyness.)
- Monterey Jack cheese: Melts incredibly smoothly. Great for mixing with cheddar.
- Cheddar cheese: Sharp cheddar adds a punch of flavor that balances the mild cheese.
- Canned black beans: Rinsed and drained thoroughly. (Adds protein and heartiness.)
- Pinto beans: Mashed slightly for a refried bean texture, or left whole.
For the Fresh Toppings
- Jalapeños: Fresh sliced for heat, or pickled for tang. (Use pickled if you want a sharper kick.)
- Green onions: Thinly sliced. Adds a fresh, oniony bite without being overpowering.
- Tomatoes: Diced Roma tomatoes. Remove seeds to keep it less watery.
- Cilantro: Chopped fresh leaves. (Essential for brightness.)
- Avocado: Sliced or diced. (Use firm avocados to prevent browning.)
For the Sauces & Salsas
- Salsa verde: Tomatillo-based salsa for a tart, green option.
- Salsa roja: Classic red salsa for heat and depth.
- Sour cream: Full fat for creaminess. Mix with a little lime juice for a drizzle sauce.
- Guacamole: Make it fresh with lime, salt, and cilantro. (Swap Greek yogurt with dairy-free coconut yogurt if needed for a lighter option.)
- Pico de gallo: Fresh salsa with a chunkier texture.
I recommend using a mix of two cheeses for the best melt. Don’t skimp on the rinsing of the beans; excess liquid is the enemy of crispiness. If you’re serving vegetarian guests, ensure your chips are certified gluten-free if needed, and double-check your cheese for any vegetarian rennet.
Equipment Needed
You don’t need much, but having the right tools makes a huge difference. The key is keeping things warm and organized.
- Large Baking Sheets: Rimmed baking sheets are essential. You want enough surface area to spread chips in a single layer. This ensures even melting and prevents soggy bottoms. I use two large half-sheet pans.
- Slow Cookers or Chafing Dishes: These are crucial for keeping the beans, meats, and salsas warm without overcooking them. A small crockpot works perfectly for beans.
- Small Serving Bowls: Get a variety of sizes. Small ramekins for salsas, medium bowls for cheeses, and larger bowls for fresh toppings like avocados and tomatoes.
- Tongs and Spoons: Use separate utensils for each topping to avoid cross-contamination and flavor mixing in the bowls.
- Prep Bowls: Have these ready before guests arrive so you can assemble quickly.
If you don’t have slow cookers, you can keep warm dishes in a low oven (around 200°F). For a budget-friendly option, use disposable aluminum trays if you’re hosting a large, messy crowd. Just make sure they are heat-safe if you’re putting hot ingredients in them.
How do I keep nachos crispy?
The secret is to never bake the toppings on the chips until the last minute. Keep the chips on the tray, but add the hot toppings only when you are ready to serve. Or better yet, use the bar method where guests assemble their own.
Preparation Method
- Prep the Beans (5 minutes): Drain and rinse a can of black beans. Place them in a small slow cooker with a pinch of cumin, garlic powder, and a splash of water. Heat on low until warm and creamy. Alternatively, microwave them in a bowl for 2 minutes, stirring halfway through. (Time estimate: 5 mins active, 10 mins warming.)
- Prepare the Cheese (2 minutes): If using block cheese, shred it now. Mix cheddar and Monterey Jack in a large bowl. If you prefer a quicker melt, you can use a bag of pre-shredded cheese, but know that the texture might be slightly less smooth. Set aside in a bowl. (Time estimate: 2 mins.)
- Make the Fresh Toppings (10 minutes): Dice the tomatoes, removing the seeds with a spoon to prevent sogginess. Slice the jalapeños thinly. Chop the green onions and cilantro. Slice the avocados and toss them with a little lime juice to prevent browning. Place each in its own small bowl. (Time estimate: 10 mins.)
- Prepare the Salsas and Creams (5 minutes): Open jars of salsa or make a quick pico de gallo. In a small bowl, mix sour cream with a squeeze of lime and a dash of salt to create a drizzle sauce. Keep these chilled until serving time. (Time estimate: 5 mins.)
- Set Up the Bar (10 minutes): Arrange your large baking sheets on the counter. Spread a single layer of tortilla chips on each sheet. This is your “base.” Place the sheets on a stable surface. Arrange all the bowls of toppings around the chips. Put the warm beans and cheese in slow cookers or warm bowls near the chips. (Time estimate: 10 mins.)
- Final Assembly Before Serving: Just before guests arrive or when the game starts, sprinkle the warm cheese and beans over the chips on the baking sheets. If you want a gooey cheese pull, put the sheets under the broiler for 1-2 minutes until the cheese is melted and bubbly. Watch them closely so they don’t burn. (Time estimate: 2 mins.)
- Invite Guests to Assemble: Place the fresh toppings, salsas, and creams within reach. Let everyone build their own nachos. This ensures every chip stays crunchy until it hits their mouth. (Time estimate: Ongoing.)
Personal tip: If you are making a huge batch, do the broiling in stages. Don’t try to melt cheese on ten sheets at once. Do four at a time in the oven. It’s faster and more efficient.
Cooking Tips & Techniques
How to avoid soggy nachos?
The biggest mistake people make is letting the chips sit under the toppings for too long before serving. If you make them ahead of time, the steam from the hot beans and cheese will soften the chips. Always add hot toppings right before eating, or use the bar method where guests assemble their own.
Another tip is to use sturdy chips. Restaurant-style chips are thicker and can handle the weight of toppings better than thin, delicate chips. If you must use thin chips, serve them immediately.
Also, drain your beans thoroughly. Excess liquid is a recipe for disaster. Pat them dry with a paper towel if they seem wet. And don’t skip the lime juice on the avocados; it keeps them fresh and adds a nice contrast to the rich cheese.
I once tried to make a giant nacho lasagna, layering chips, beans, and cheese in a deep dish. It was a mess. The bottom layer turned into mush. Stick to single layers. It’s easier to eat, easier to serve, and much more delicious. Keep it simple. Let the ingredients shine. And always, always have extra napkins. You will need them.
Variations & Adaptations
One of the best things about a nacho bar is how adaptable it is. You can tweak it to fit any diet or preference.
- Vegetarian/Vegan: Skip the meat entirely. Use a vegan cheese alternative, which has improved greatly in recent years. Use black beans or pinto beans as the protein base. Add roasted sweet potatoes or cauliflower for extra substance. Use dairy-free sour cream and guacamole.
- Low-Carb/Keto: Swap tortilla chips for tortilla chips made with almond flour or pork rinds. Pork rinds are a great crunchy alternative that holds up well to toppings. Load up on cheese, meats, and veggies, and skip the beans if you’re strict.
- Protein-Packed: Add shredded rotisserie chicken, pulled pork, or seasoned ground beef. Keep the meats warm in a slow cooker with a little sauce so they stay moist. Chili is also a great topping for a heartier version.
- Spicy Kick: Add diced hot peppers, use a spicy salsa, or sprinkle crushed red pepper flakes over the cheese before broiling. For mild heat, stick to jalapeños and mild salsa.
- Seasonal Twist: In the fall, add roasted squash or sweet potatoes. In the summer, add fresh corn and black bean salsa for a lighter vibe.
I’ve tried adding pulled BBQ chicken, and it was a hit, but it changes the flavor profile significantly. It’s more of a meal than a snack. For a classic game day vibe, stick to the traditional Mexican-inspired toppings. But feel free to experiment. That’s the beauty of a bar—everyone can customize their own experience.
Serving & Storage Suggestions
Serve the nacho bar at room temperature or slightly warm. The chips should be at room temperature, but the beans and cheeses should be warm. This contrast in temperatures is key to the experience. Place the bar on a sturdy table where people can gather around. Have plenty of napkins and small plates ready.
Complementary dishes include a simple green salad or some corn on the cob. For beverages, pair with cold beer, margaritas, or iced tea. The flavors are bold, so you want drinks that can cut through the richness.
Storage: Leftover plain chips can be stored in an airtight container for a few days. However, assembled nachos do not store well. The chips will get soggy. If you have leftover toppings, store them in separate airtight containers in the refrigerator. The beans and meats can be reheated in the microwave or on the stove. The fresh veggies should be used within 2-3 days.
Reheating: If you must reheat assembled nachos, do so in the oven at 350°F for about 10 minutes to re-crisp the chips. The microwave will make them soft and chewy, which is not ideal. But honestly, they’re best fresh. Plan your portions carefully to avoid leftovers.
Flavors develop over time, especially the beans and salsas. If you make the salsa a day ahead, let it sit in the fridge. The flavors will meld and become more complex. The guacamole, however, should always be made fresh to avoid browning.
Nutritional Information & Benefits
Nachos are indulgent, but they can be part of a balanced meal if you’re mindful of portions. A typical serving includes healthy fats from the avocado and cheese, protein from the beans and cheese, and carbohydrates from the chips. Adding fresh veggies like tomatoes and cilantro provides vitamins and fiber.
For those watching their sodium, opt for low-sodium beans and make your own salsa without added salt. The cheese is high in calcium, which is good for bone health. Avocados provide heart-healthy monounsaturated fats.
It’s not a diet food, but it’s not entirely empty calories either. The key is balance. Load up on the veggies and beans, and moderate the chips and cheese. As a host, I try to offer a variety of options so everyone can make choices that work for their bodies. It’s about enjoying the moment, not stressing over every calorie. Just eat mindfully and enjoy the company.
Conclusion
This loaded nacho bar for game day is more than just a snack; it’s a solution. It solves the problem of feeding a crowd without spending hours in the kitchen. It’s interactive, delicious, and endlessly customizable. Whether you’re watching the Super Bowl, a local football game, or just hanging out with friends, this bar will be the star of the show.
I encourage you to experiment with the toppings. Add your favorite meats, try new salsas, or make your own chips from scratch. The possibilities are endless. And don’t be afraid to make a mess. That’s part of the fun. This recipe has saved me from kitchen stress during big games, and I know it will do the same for you.
So, gather your ingredients, set up your bar, and get ready for a great time. I’d love to hear how your nacho bar turns out. Leave a comment below with your favorite topping combination. Share your photos on social media and tag me. Let’s celebrate the joy of food and friends together. Enjoy every bite, and have a fantastic game day!
Frequently Asked Questions
Can I make the nacho bar ahead of time?
You can prep all the ingredients ahead of time, but do not assemble the full nachos until just before serving. The chips will get soggy if they sit under the toppings for too long. Keep the chips separate and add the warm toppings right before guests arrive.
What is the best cheese for nachos?
A mix of cheddar and Monterey Jack is ideal. Cheddar provides flavor, while Monterey Jack melts smoothly. Avoid pre-shredded cheese if possible, as it contains anti-caking agents that can prevent a smooth melt. Shred your own cheese from a block for the best results.
How do I keep the toppings warm?
Use slow cookers or chafing dishes for the beans, meats, and salsas. These keep the food warm without overcooking it. If you don’t have these, you can keep small bowls of toppings in a low oven (around 200°F). Just check them frequently to ensure they don’t dry out.
Can I make this gluten-free?
Yes! Simply use certified gluten-free tortilla chips. Many brands offer corn-based chips that are naturally gluten-free. Also, check your cheese and salsa labels to ensure they don’t contain any hidden gluten ingredients. Most basic ingredients are safe.
What are some good meat options for nachos?
Shredded chicken, pulled pork, seasoned ground beef, or chorizo are all great options. You can also use leftover roast beef or turkey. Keep the meats warm in a slow cooker with a little sauce to keep them moist. For a lighter option, try grilled shrimp or tofu.
Pin This Recipe!

Loaded Nacho Bar for Game Day

An interactive, crowd-pleasing nacho bar that keeps chips crispy by separating wet and dry ingredients. Perfect for game day, this recipe allows guests to build their own nachos for maximum crunch and flavor.
- Prep Time: 22 minutes
- Cook Time: 10 minutes
- Total Time: 32 minutes
- Yield: 8-10 servings
- Category: Appetizer
- Cuisine: Mexican
Ingredients
- Restaurant-style tortilla chips
- White corn tortilla chips (optional, for gluten-free)
- Blue corn tortilla chips (optional)
- Shredded Mexican blend cheese
- Monterey Jack cheese
- Sharp cheddar cheese
- Canned black beans, rinsed and drained
- Pinto beans, mashed or whole
- Fresh jalapeños, sliced
- Pickled jalapeños
- Green onions, thinly sliced
- Roma tomatoes, diced and seeded
- Fresh cilantro, chopped
- Avocados, sliced or diced
- Salsa verde
- Salsa roja
- Sour cream
- Lime juice
- Guacamole
- Pico de gallo
- Cumin
- Garlic powder
Instructions
- Drain and rinse black beans. Place in a small slow cooker with cumin, garlic powder, and a splash of water. Heat on low until warm and creamy.
- Shred block cheese if using. Mix cheddar and Monterey Jack in a large bowl. Set aside.
- Dice tomatoes, removing seeds to prevent sogginess. Slice jalapeños, chop green onions and cilantro. Slice avocados and toss with lime juice to prevent browning. Place each in separate small bowls.
- Open jars of salsa or prepare pico de gallo. Mix sour cream with lime juice and salt to create a drizzle sauce. Keep chilled.
- Arrange large baking sheets on the counter. Spread a single layer of tortilla chips on each sheet.
- Arrange all bowls of toppings around the chips. Place warm beans and cheese in slow cookers or warm bowls near the chips.
- Just before serving, sprinkle warm cheese and beans over the chips on the baking sheets.
- Optional: Broil sheets for 1-2 minutes until cheese is melted and bubbly, watching closely to prevent burning.
- Invite guests to assemble their own nachos using the fresh toppings, salsas, and creams.
Notes
Keep wet and dry ingredients separate to maintain chip crunchiness. Use sturdy restaurant-style chips. Drain beans thoroughly to avoid sogginess. If making a large batch, broil in stages to ensure even melting.
Nutrition
- Serving Size: Varies by guest pref
- Calories: 450
- Sugar: 2
- Sodium: 650
- Fat: 28
- Saturated Fat: 12
- Carbohydrates: 35
- Fiber: 5
- Protein: 12
Keywords: nacho bar, game day snacks, easy appetizer, crowd pleaser, party food, mexican snacks, crispy nachos