Most granola bars you buy at the store are just sugar bricks in disguise. You know the ones. They snap loudly when you break them, leave a gritty residue on your fingers, and taste like artificial vanilla and regret. I used to eat those for breakfast during my early hiking days, thinking I was being healthy. I was wrong. They crashed my energy by 10 AM and left me craving something worse.
The difference with a homemade trail mix granola bar is the texture. It’s supposed to hold together without being cement-hard. It should offer a slight resistance when you bite down, followed by the crunch of toasted oats and the soft chew of dried fruit. That specific mouthfeel is what makes this recipe worth the effort. It’s not about perfection; it’s about that sticky, golden bond created by real honey and oat syrup.
I developed this recipe after a trip to the grocery store where I found myself staring at a $6 box of bars for twenty minutes. They had seventeen ingredients I couldn’t pronounce. I went home and threw together a batch in my kitchen using stuff I already had. The first batch was a bit too loose, but the second one was perfect. Now, it’s my go-to for weekend hikes, lunchbox packing, and those mid-afternoon slumps when I need real fuel.
There’s a quiet satisfaction in knowing exactly what’s in your food. No preservatives, no weird gums, just oats, nuts, seeds, and dried fruit bound together by simple, wholesome ingredients. It’s honest food. And honestly, once you try it, you’ll never go back to the store-bought stuff again.
Why You’ll Love This Recipe
Let’s be real for a second. Making granola bars from scratch sounds like a lot of work. But honestly, it’s one of the easiest baking projects you can tackle, and the results are leagues ahead of anything you’ll buy in a plastic wrapper. I’ve tested dozens of versions over the years, from vegan options to high-protein variants, and this specific balance of wet and dry ingredients is the winner. It’s reliable, it’s forgiving, and it tastes incredible.
- Quick & Easy: This recipe comes together in under 30 minutes of active prep time. You’re not standing over a stove for hours. It’s a mix, press, bake, and chill routine that fits perfectly into a busy Saturday morning.
- Simple Ingredients: No fancy grocery trips needed. You likely already have rolled oats, honey, and a bag of mixed nuts in your pantry. This is about using what you have and making it shine.
- Perfect for On-the-Go: Whether you’re heading to the gym, packing a lunch for kids, or prepping for a long hike, these bars are durable. They don’t crumble into your bag, and they don’t melt in your car on a hot day (mostly).
- Crowd-Pleaser: These get rave reviews from kids and adults alike. The sweetness comes from natural sources, so it’s not cloying, but it still satisfies that sweet tooth. My nephew usually asks for these instead of candy bars now.
- Unbelievably Delicious: The texture and flavor combo is next-level comfort food. Toasted oats paired with salty nuts and chewy raisins create a profile that is savory, sweet, and crunchy all at once.
What makes this recipe different is the binding agent. Many recipes use too much maple syrup, which can make the bars soggy or overly sweet. By using a combination of honey and a touch of brown sugar, we get a deep, caramel-like flavor that holds the bars together firmly without making them rock hard. It’s a small tweak that makes a huge difference in the final bite.
This isn’t just a snack; it’s a meal prep hack. It’s the kind of recipe that makes you feel organized and healthy, even on chaotic weeks. It’s comfort food reimagined—nutritious, fast, but with the same soul-soothing satisfaction as a cookie. Perfect for impressing guests with a healthy treat, or turning a simple breakfast into something memorable.
What Ingredients You Will Need
This recipe relies on simple, wholesome ingredients to deliver bold flavor and satisfying texture without the fuss. The key is quality. Since there are so few ingredients, each one needs to do heavy lifting. You want oats that are chewy, nuts that are fresh, and sweeteners that bind without overpowering. Most of these are pantry staples, but I recommend checking the freshness of your nuts before starting.
For the Base
- Old-Fashioned Rolled Oats: 3 cups (about 270g). Do not use instant oats; they turn to mush. Use the thick, hearty kind for that proper chew.
- Almond Flour: 1/2 cup (about 50g). This adds structure and helps bind the bars. It also adds a nice subtle nuttiness.
- Chia Seeds: 2 tablespoons. These act as a natural binder, helping to hold the bars together without adding flavor.
For the Crunch and Flavor
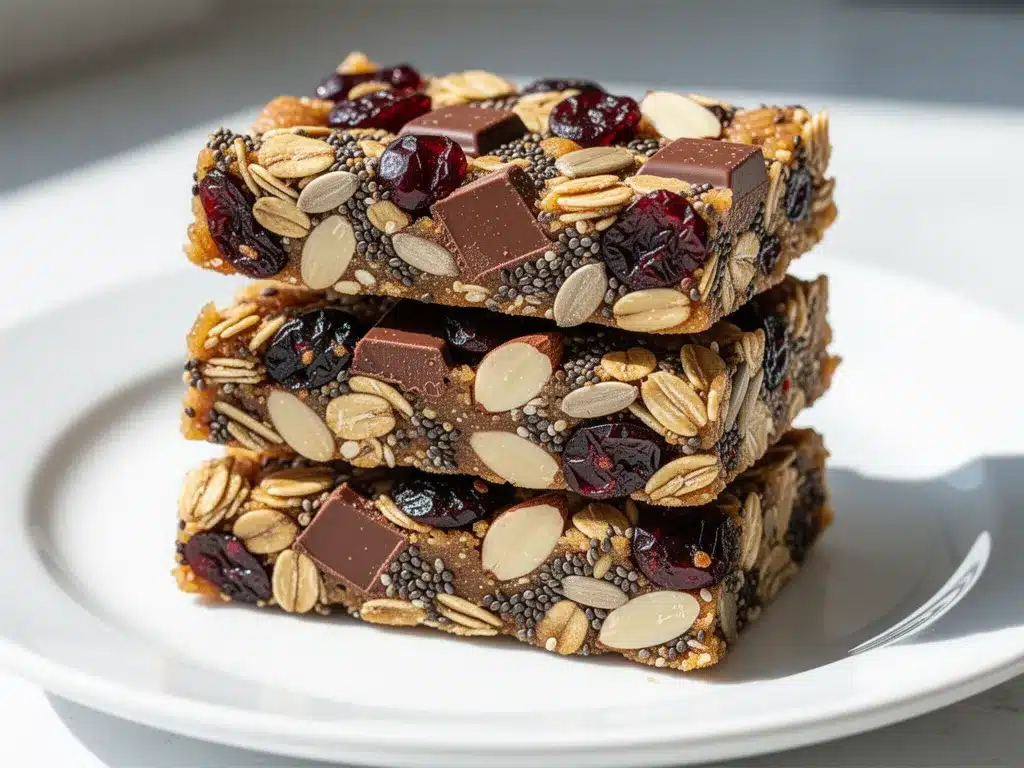
- Raw Almonds: 1 cup, roughly chopped. I prefer raw almonds because they toast better in the oven. Salted works too, but you’ll need to reduce added salt.
- Walnuts: 1/2 cup, roughly chopped. Walnuts add a bitter contrast to the sweet honey. If you dislike the texture, you can skip them, but I recommend keeping them.
- Pumpkin Seeds (Pepitas): 1/2 cup. These add a nice green pop of color and a mild, earthy flavor.
- Sunflower Seeds: 1/2 cup. A cheap and effective way to bulk up the mix without adding too much cost.
For the Binding and Sweetness
For the Mix-Ins
- Dried Cranberries: 1/2 cup. Tart cranberries cut through the sweetness of the honey. You can substitute with raisins or dried cherries if you prefer.
- Dark Chocolate Chips: 1/2 cup. Semi-sweet chips work best. For a non-chocolate version, just add more dried fruit or coconut flakes.
- Desiccated Coconut: 1/4 cup. Unsweetened. Adds a nice chew and tropical aroma.
Equipment Needed
You don’t need a lot of fancy gadgets to make these bars. A few basic tools will get you through this recipe with ease. The most important piece of equipment is an 8×8 inch baking pan. A metal pan is best because it conducts heat evenly and helps crisp up the edges of the granola. Glass pans work too, but the bars might be slightly softer.
A large mixing bowl is essential. You want something big enough to toss all the dry ingredients without spilling. I usually use a bowl that’s at least 4 quarts in size. A silicone spatula is your best friend here. You’ll need it to scrape the sticky honey mixture from the bowl and to press the granola firmly into the pan. A regular spoon won’t cut it; the mixture is too thick.
A small saucepan is needed to heat the wet ingredients. Warming the honey and oil mixture makes it much easier to stir into the dry ingredients. If the honey is too cold and thick, it won’t coat the oats evenly, leading to dry spots. A whisk is helpful for blending the honey, syrup, and oil until smooth.
For cutting, I recommend using a sharp chef’s knife. A serrated knife can also work if the bars are very hard, but a sharp straight edge gives cleaner cuts. Parchment paper is non-negotiable. Line your pan with it, leaving an overhang on the sides. This allows you to lift the entire block of granola out of the pan once it’s set, making cutting and cleaning a breeze.
Preparation Method
- Preheat and Prepare Pan (5 mins): Start by preheating your oven to 350°F (175°C). Take your 8×8 inch baking pan and line it with parchment paper. Leave a good overhang on the long sides; this will act as a sling to lift the bars out later. Lightly grease the parchment with a little coconut oil or cooking spray to prevent sticking.
- Mix Dry Ingredients (5 mins): In your large mixing bowl, combine the rolled oats, almond flour, chia seeds, chopped almonds, walnuts, pumpkin seeds, and sunflower seeds. Stir them together with a large spoon or your hands until everything is evenly distributed. This step ensures you get a bit of everything in every bite.
- Heat Wet Ingredients (3 mins): In a small saucepan over low heat, combine the honey, maple syrup, melted coconut oil, brown sugar, vanilla extract, cinnamon, and salt. Warm this mixture gently, stirring occasionally, just until the sugar dissolves and everything is liquid. Do not let it boil. Remove from heat immediately.
- Combine Wet and Dry (2 mins): Pour the warm honey mixture over the dry ingredients. Use your silicone spatula to fold everything together. You want to make sure every oat and nut is coated in the sticky mixture. This might take a minute of vigorous stirring. If it feels too dry, you can add a teaspoon more maple syrup.
- Add Mix-Ins (1 min): Gently fold in the dried cranberries, dark chocolate chips, and desiccated coconut. Be careful not to break up the chocolate chips too much. The mixture will be very thick and sticky at this point. That’s exactly what we want.
- Press into Pan (5 mins): Transfer the mixture into your prepared pan. Use the back of your spatula or a lightly greased measuring cup to press the mixture down firmly. This is the most critical step. You need to pack it down tightly, layer by layer. If it’s loose, the bars will crumble. Press until the surface is flat and compact.
- Bake (20 mins): Place the pan in the preheated oven. Bake for 20 minutes. The edges should turn golden brown, and the center should look set. If you see bubbling around the edges, it’s ready. Do not overbake, or they will become hard as rocks.
- Chill and Cut (1 hour): Remove the pan from the oven and let it cool completely on a wire rack. This takes time. Do not try to cut them while they are warm, or they will fall apart. Once cool, use the parchment sling to lift the granola block out of the pan. Place it on a cutting board and slice into bars or squares with a sharp knife.
Cooking Tips & Techniques
One of the biggest mistakes people make with granola bars is not pressing them down hard enough. I learned this the hard way with my first batch. They came out of the oven looking perfect but shattered into crumbs as soon as I tried to pick one up. The key is firm, even pressure. Use the bottom of a heavy glass or measuring cup to pack the mixture down into the corners. It should feel like a solid slab, not a loose cluster.
Another tip is to watch your oven closely. Granola burns quickly because of the sugar content. If your oven runs hot, check the bars at 18 minutes. The edges should be golden, not dark brown. Dark edges mean burnt sugar, which tastes bitter. If they are too pale, they won’t set properly. Aim for a light golden hue.
Temperature matters for the wet ingredients. If your honey is too cold, it won’t mix well with the oats. Warming it slightly makes a huge difference in how evenly it coats the dry ingredients. Also, make sure your nuts are fresh. Old nuts can go rancid and taste bitter, which ruins the whole batch. If they smell off, toss them.
Multitasking is key here. While the bars are cooling, you can clean up your bowls. The sticky mess happens early, so get it done while you wait. Also, let the bars cool completely before cutting. Patience is a virtue in baking. Rushing this step leads to messy, crumbly bars. If you’re in a hurry, you can speed up the cooling process by putting the pan in the fridge for 30 minutes, but room temperature cooling is best for even setting.
Variations & Adaptations
Granola bars are incredibly versatile. You can tweak this recipe to fit your dietary needs or taste preferences. Here are a few variations I’ve tried:
- Vegan Option: Swap the honey for agave nectar or maple syrup. Use coconut oil instead of butter. The texture will be slightly softer, but the flavor is still great.
- Gluten-Free: Ensure your oats are certified gluten-free. The rest of the ingredients are naturally gluten-free, so this is an easy swap.
- Nut-Free: For school-safe snacks, swap almonds and walnuts for extra sunflower and pumpkin seeds. You can also use sunflower seed butter in the wet mix for extra binding.
- Protein Boost: Add a scoop of unflavored or vanilla protein powder to the dry ingredients. You may need to add an extra tablespoon of liquid to compensate for the dryness.
- Chocolate Lovers: Double the chocolate chips or add chunks of dark chocolate instead of chips. You can also drizzle melted chocolate over the top after baking for a fancy finish.
I personally love adding a pinch of sea salt on top before baking. It enhances the sweetness and adds a savory crunch. You can also swap the dried cranberries for dried apricots, chopped. The tartness of apricots pairs beautifully with the honey and almonds.
Serving & Storage Suggestions
These bars are best served at room temperature. They have a chewy texture that is perfect for snacking. You can serve them with a glass of cold milk or a cup of coffee for a complete breakfast. They also make a great addition to a picnic basket or a hiking backpack.
For storage, keep the bars in an airtight container. They will stay fresh at room temperature for up to one week. If you live in a humid climate, store them in the refrigerator to prevent them from getting too soft. For longer storage, freeze them. Place parchment paper between each bar to prevent sticking, and store them in a freezer-safe bag. They will last for up to three months in the freezer.
To reheat, simply let them sit at room temperature for 15 minutes. You can also microwave them for 10 seconds if you prefer a softer texture. The flavors actually develop and meld together over the first day, so they often taste better on day two than on day one.
Nutritional Information & Benefits
These granola bars are a great source of energy. Rolled oats provide complex carbohydrates for sustained energy release, while nuts and seeds offer healthy fats and protein. This combination helps keep you full and focused. Each bar contains roughly 200-250 calories, depending on the size and mix-ins.
The oats are rich in fiber, which supports digestive health. The nuts provide vitamin E and magnesium. Honey offers antioxidants, though it is still a sugar, so enjoy in moderation. These bars are naturally free from artificial preservatives, colors, and flavors, making them a cleaner snack option.
For those watching their sugar intake, you can reduce the honey and brown sugar slightly, though the bars may be less sweet. Overall, this is a nutrient-dense snack that fuels your body with real food. It’s a far better choice than processed bars loaded with high-fructose corn syrup.
Conclusion
Making wholesome homemade trail mix granola bars is a simple way to take control of your snacking. It’s a recipe that rewards you with real, honest food that tastes incredible. Once you master this basic method, you’ll find yourself experimenting with different nuts, seeds, and dried fruits, making every batch unique.
I hope you try this recipe and find it as useful and delicious as I do. It’s become a staple in my kitchen, and I know it will be in yours too. Don’t be afraid to customize it to your liking. Add your favorite mix-ins, adjust the sweetness, or make it nut-free for friends. The possibilities are endless.
If you make these bars, I’d love to hear how they turned out. Leave a comment below with your favorite variations or tips. Share your creations on social media and tag me so I can see your delicious results. Happy baking, and enjoy your wholesome snack!
FAQs
Can I use quick oats instead of rolled oats?
It’s not recommended. Quick oats are thinner and will turn mushy when baked. Rolled oats provide the necessary chew and structure for the bars. If you must use quick oats, reduce the baking time slightly, but the texture will be different.
Why are my granola bars crumbly?
This usually happens if the bars weren’t pressed down firmly enough before baking, or if they were cut while still warm. Make sure to pack the mixture tightly into the pan and let them cool completely before slicing.
How do I store granola bars?
Store them in an airtight container at room temperature for up to a week. For longer storage, keep them in the refrigerator or freezer. They freeze well for up to three months.
Can I make these bars vegan?
Yes. Simply swap the honey for agave nectar or maple syrup, and use coconut oil instead of butter. The rest of the ingredients are already vegan-friendly.
Can I add protein powder to this recipe?
Yes, you can add a scoop of protein powder. Keep in mind that protein powder absorbs moisture, so you may need to add an extra tablespoon of liquid (honey or milk) to keep the mixture from being too dry.
Pin This Recipe!
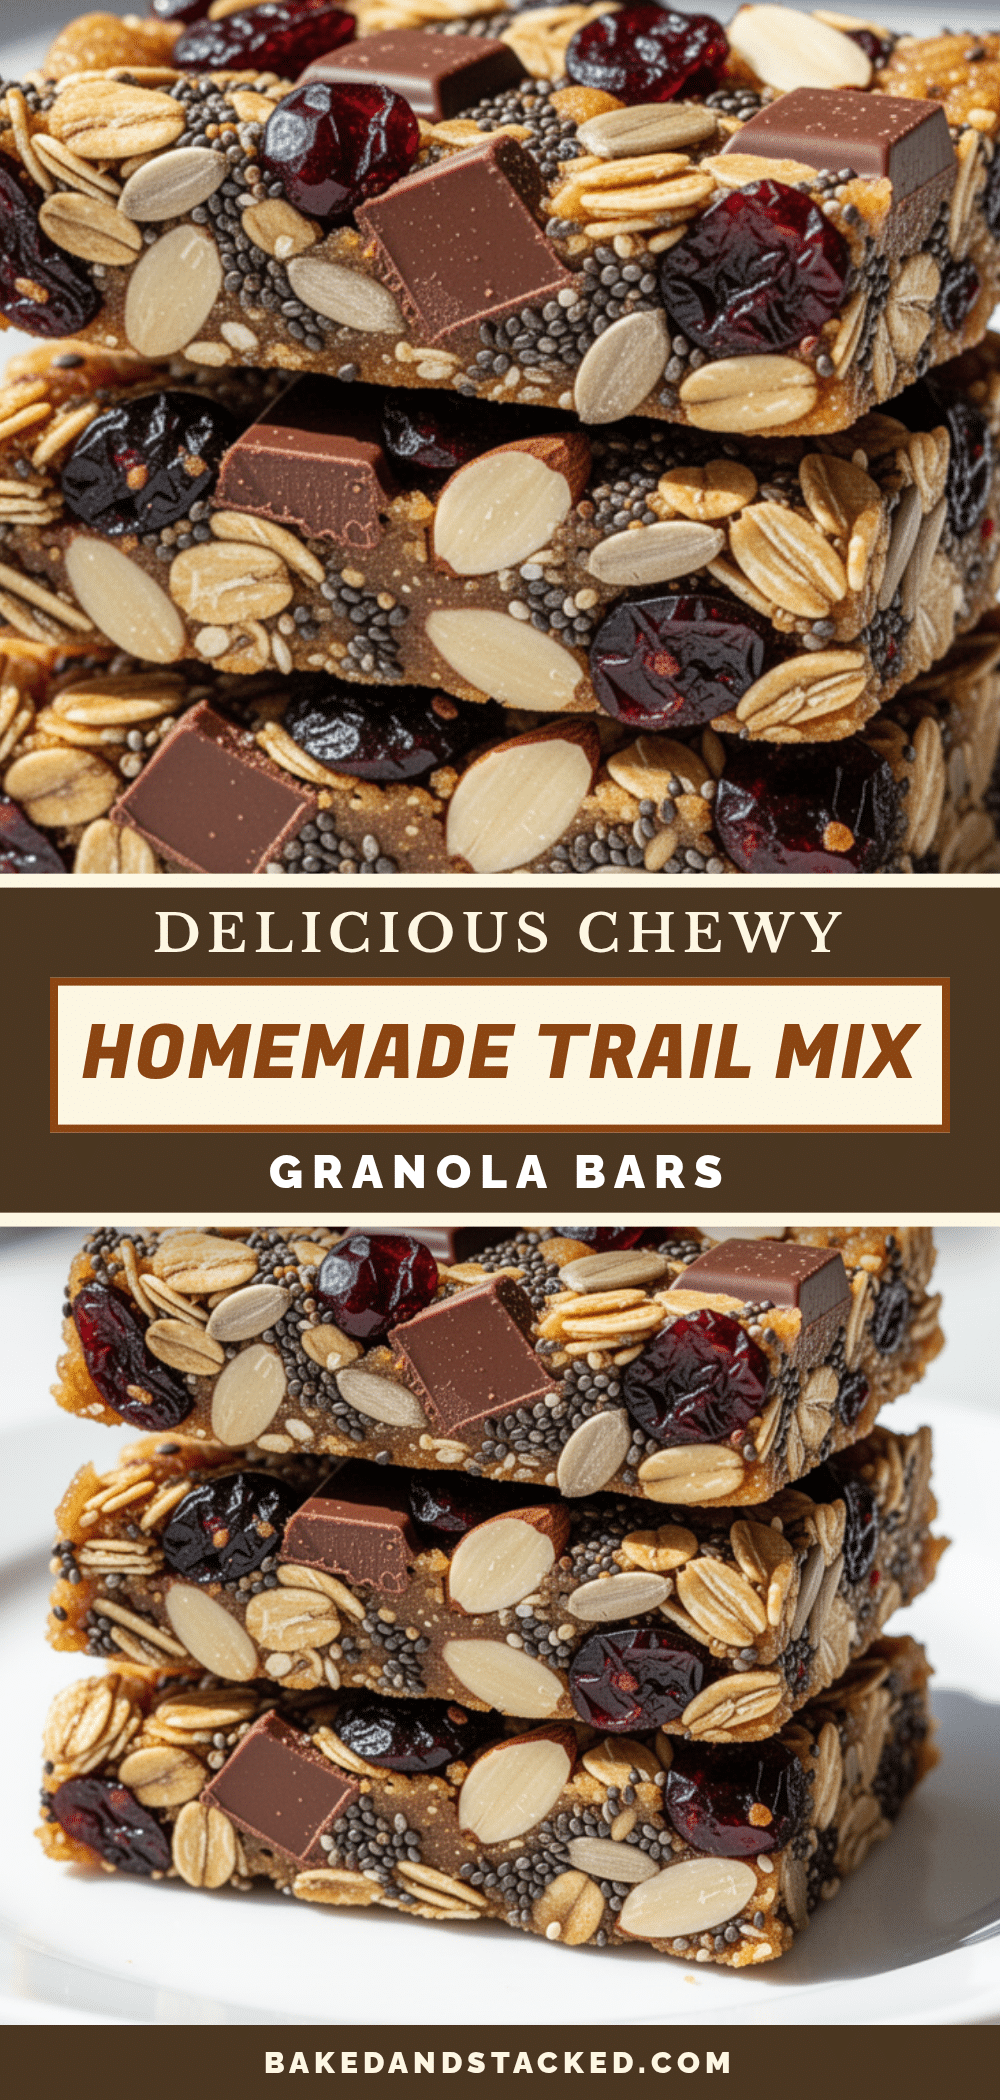
Wholesome Homemade Trail Mix Granola Bars
A simple, wholesome homemade granola bar recipe using real ingredients like honey, oats, nuts, and seeds. These bars offer a perfect balance of chewy and crunchy textures without artificial preservatives.
- Prep Time: 15 minutes
- Cook Time: 20 minutes
- Total Time: 1 hour 35 minutes
- Yield: 12 servings 1x
- Category: Snack
- Cuisine: American
Ingredients
- 3 cups Old-Fashioned Rolled Oats
- 1/2 cup Almond Flour
- 2 tablespoons Chia Seeds
- 1 cup Raw Almonds, roughly chopped
- 1/2 cup Walnuts, roughly chopped
- 1/2 cup Pumpkin Seeds (Pepitas)
- 1/2 cup Sunflower Seeds
- 1/2 cup Raw Honey
- 1/4 cup Maple Syrup
- 3 tablespoons Coconut Oil, melted
- 2 tablespoons Brown Sugar, packed
- 1 teaspoon Vanilla Extract
- 1/2 teaspoon Cinnamon
- 1/4 teaspoon Salt
- 1/2 cup Dried Cranberries
- 1/2 cup Dark Chocolate Chips
- 1/4 cup Desiccated Coconut, unsweetened
Instructions
- Preheat oven to 350°F (175°C). Line an 8×8 inch baking pan with parchment paper, leaving an overhang on the long sides, and lightly grease with coconut oil.
- In a large mixing bowl, combine rolled oats, almond flour, chia seeds, chopped almonds, walnuts, pumpkin seeds, and sunflower seeds. Stir to distribute evenly.
- In a small saucepan over low heat, combine honey, maple syrup, melted coconut oil, brown sugar, vanilla extract, cinnamon, and salt. Warm gently until sugar dissolves and mixture is liquid. Do not boil. Remove from heat.
- Pour the warm honey mixture over the dry ingredients. Use a silicone spatula to fold everything together until every oat and nut is coated.
- Gently fold in dried cranberries, dark chocolate chips, and desiccated coconut.
- Transfer the mixture to the prepared pan. Press down firmly and evenly using the back of a spatula or a greased measuring cup to pack it tightly.
- Bake for 20 minutes, or until edges are golden brown and the center looks set.
- Remove from oven and let cool completely on a wire rack. Once cool, lift the granola block out using the parchment sling and slice into bars with a sharp knife.
Notes
Do not use instant oats as they turn to mush. Press the mixture firmly into the pan to prevent crumbling. Cool completely before cutting to ensure clean slices. For vegan version, swap honey for agave nectar. For nut-free, swap almonds/walnuts for extra seeds.
Nutrition
- Serving Size: 1 bar
- Calories: 225
- Sugar: 14
- Sodium: 110
- Fat: 12
- Saturated Fat: 3
- Carbohydrates: 28
- Fiber: 3
- Protein: 5
Keywords: granola bars, homemade trail mix, healthy snacks, meal prep, gluten-free option, vegan option, no bake alternative, hiking snacks