It is 3 AM, and the only thing I want is a quiet moment with sugar and fear.
The house is still. The fridge hums its usual low tune, the only sound breaking the silence of the sleeping neighborhood. Outside, October wind rattles the loose pane in the guest room window, a familiar autumn complaint I’ve learned to ignore. Inside, the kitchen is a sanctuary of warm light and scattered flour.
I am making ghost meringues.
Not the soft, chewy kind that stick to your teeth. No, I want these to shatter. I want them to snap with a sharp, crisp sound when I bite into them, like walking on dry leaves or breaking a thin layer of ice. They are for Halloween, obviously, but honestly, I make them because I need the ritual.
The process is meditative. Separating eggs while half-asleep requires focus. You can’t be sloppy here. One yolk drop ruins the whole batch. It’s a high-stakes game played in pajamas. I whip the whites until they form stiff, glossy peaks that hold their shape against gravity. It’s alchemy, really. Turning clear, slimy egg whites into fluffy, white clouds that bake into hard, delicate shells.
There is something deeply satisfying about creating something spooky that is also incredibly simple. No baking powder, no flour, just eggs and sugar. It feels pure. Honest.
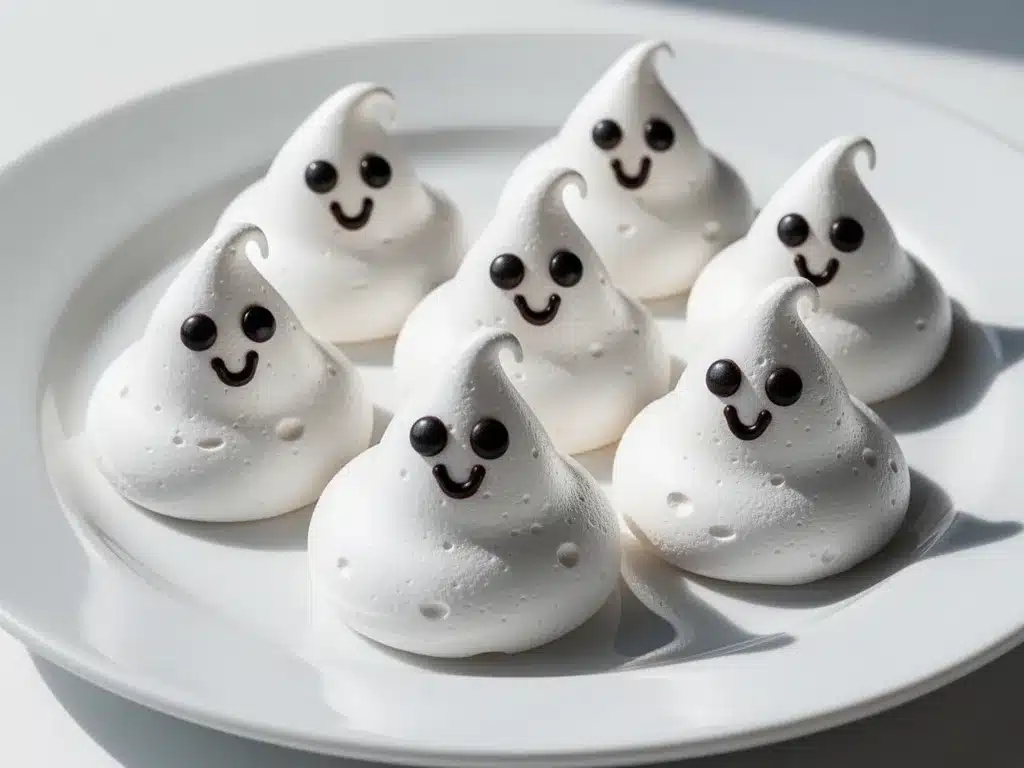
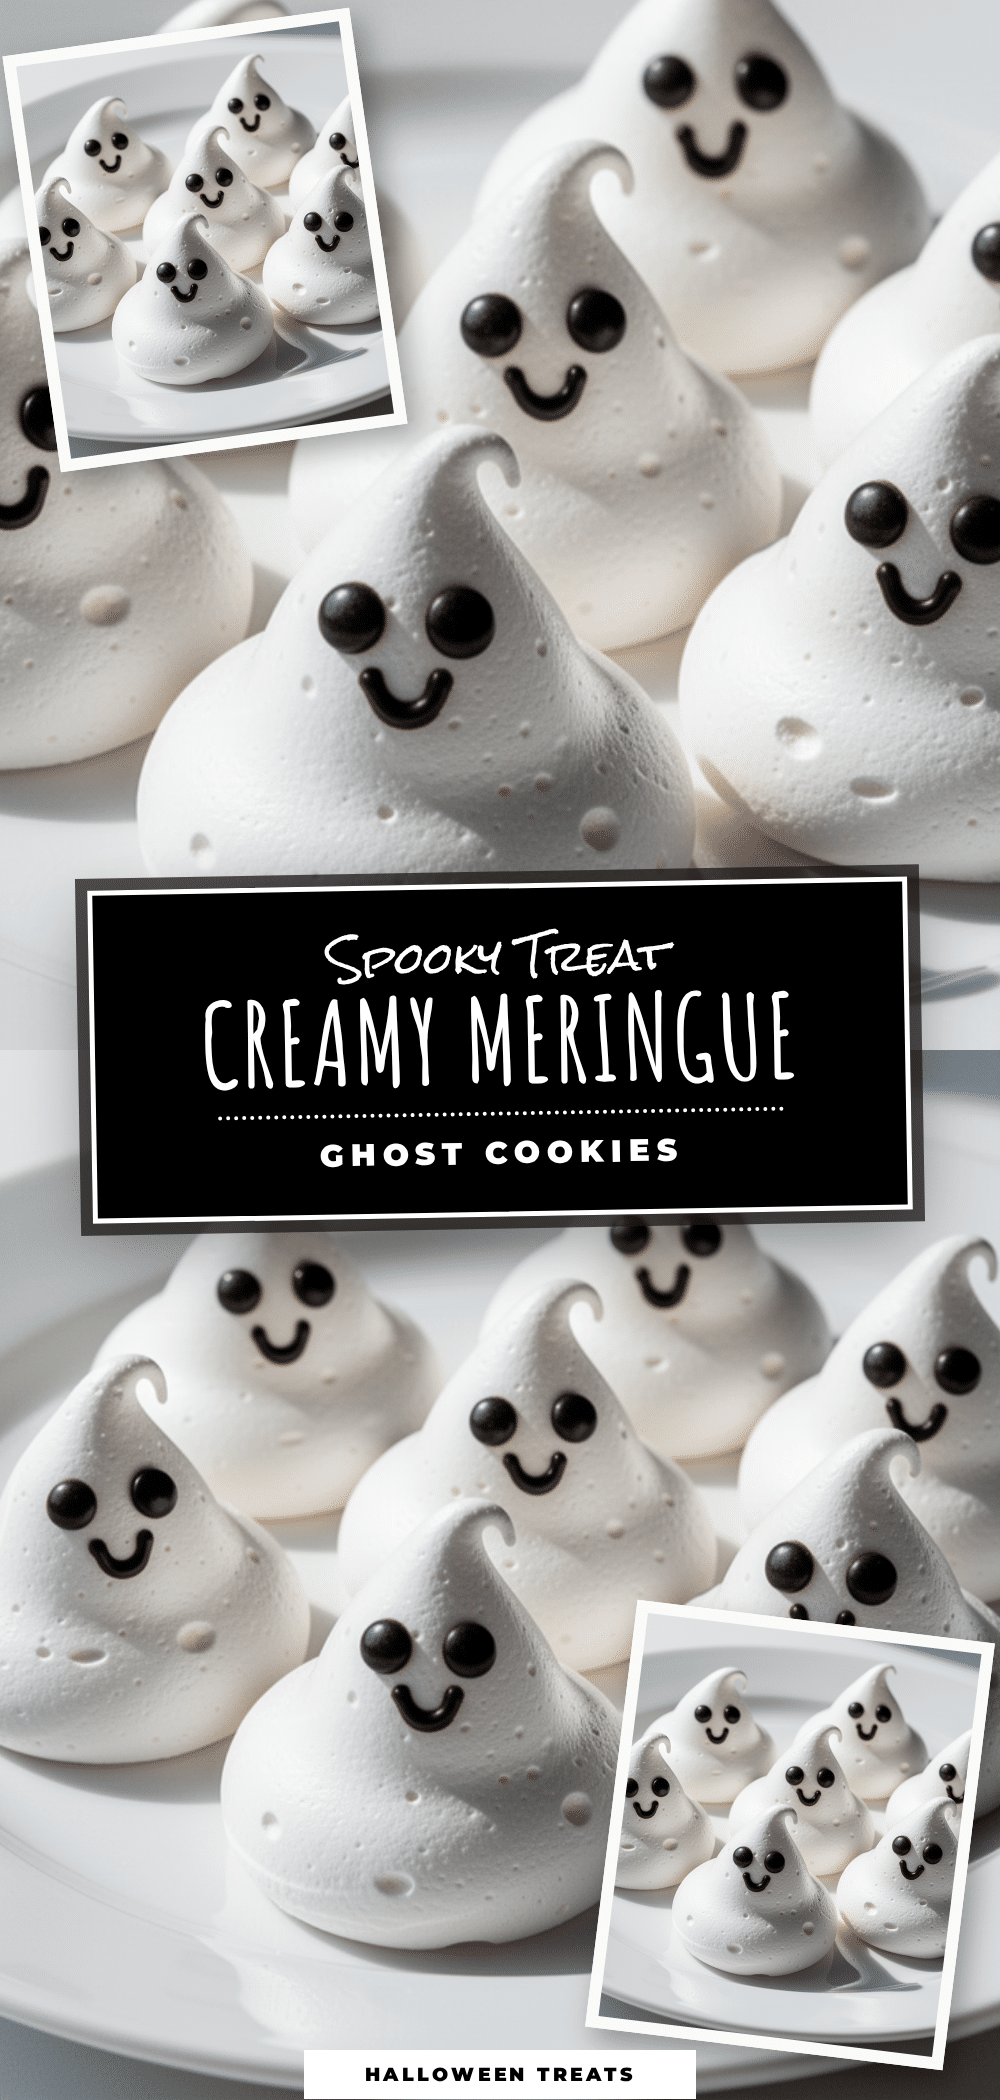
I pipe them onto the tray, swirling the bag to create those classic ghostly shapes. The little stems at the bottom, the rounded tops. They look like they are floating just above the parchment paper. When I put them in the low oven, the smell of baking sugar fills the air, sweet and nostalgic.
I wait. The oven stays low, just a gentle warmth that dries them out slowly. This is the hard part. Patience. If you rush it, they crack. If you burn them, they turn brown and sad. But if you let them be, they emerge later, pale and crisp, ready to haunt your cookie jar.
I eat one warm. It dissolves on the tongue, sweet and airy. It tastes like childhood Halloween, like trick-or-treating with a flashlight, like the thrill of seeing a shadow move in the corner of your eye. That’s why I keep making them. Not for the looks, but for the feeling. The quiet joy of making something beautiful from nothing but air and sugar.
Why You’ll Love This Recipe
Experience-Tested Perfection
Let’s be real, meringues can be a nightmare. I have failed more times than I care to admit. Burnt bottoms, weeping centers, flat discs instead of ghosts. But after years of tweaking temperatures and whipping times, I have cracked the code. This recipe is built on trial and error, ensuring you get that perfect snap every single time.
Quick & Easy Preparation
While they bake for hours, the active time is less than twenty minutes. You just whisk, pipe, and wait. It is perfect for busy weeknights or last-minute Halloween prep. You can even make them a week in advance, which is a lifesaver when hosting parties.
Simple Ingredients
You likely already have everything in your kitchen. Egg whites, sugar, and a pinch of salt. No fancy grocery trips needed. No weird additives or preservatives. Just clean, simple food that tastes like pure sweetness.
Perfect for Halloween
These are the ultimate spooky treat. They look like little floating spirits, but they are delicate and delicious. Great for potlucks, classroom parties, or just haunting your own pantry. They add a touch of whimsy to any Halloween table.
Crowd-Pleaser
Kids love the shape. Adults love the crisp texture. They are a hit with everyone, from toddlers to grandmas. I’ve served these at every Halloween party for the last five years, and they always disappear first.
Unbelievably Delicious
The texture is next-level. Crispy on the outside, slightly melt-in-your-mouth in the center. It’s not just a cookie; it’s an experience. The sweetness is balanced, not cloying, making them easy to eat by the handful.
What Makes This Recipe Different
Most meringue recipes are just egg whites and sugar. This one includes a secret tip: adding a tiny bit of cornstarch. It stabilizes the meringue, preventing it from collapsing and helping it dry out evenly. It also gives them a slightly more tender crunch, rather than being hard as rock. It’s a small change that makes a huge difference in the final texture.
The Emotional Connection
This recipe isn’t just good—it is the kind that makes you smile when you see the little ghosts staring back at you from the jar. It’s comfort food reimagined for the spooky season. It’s about creating a little magic in your kitchen, turning simple ingredients into something that feels festive and fun. It’s perfect for impressing guests without stress, or turning a simple afternoon into a creative project with the kids.
What Ingredients You Will Need
This recipe uses simple, wholesome ingredients to deliver bold flavor and satisfying texture without the fuss. The beauty of meringue lies in its simplicity, but the quality of those few ingredients matters more than you might think. Here is what you need to make these crispy ghost meringues.
For the Meringue Base
- Egg whites: Large eggs, room temperature. This is crucial. Cold egg whites do not whip up to the same volume. I use pastured eggs for the best color and flavor, but any large eggs will work. You will need 3 large egg whites.
- Granulated sugar: Fine, white sugar. I recommend C&H Pure Cane Sugar for its consistent grain size, which dissolves more easily into the egg whites. You will need 3/4 cup (150g).
- Cornstarch: This is the secret weapon. It absorbs excess moisture and helps keep the meringues crisp. You will need 1 teaspoon.
- Cream of tartar: An acid that stabilizes the egg whites, helping them hold their shape. You will need 1/4 teaspoon.
- Vanilla extract: Pure vanilla, not imitation. It adds a subtle warmth that pairs perfectly with the sweetness. You will need 1/2 teaspoon.
- Salt: Just a pinch to balance the sweetness. Use fine sea salt.
For the Ghost Details (Optional)
- Black food gel: Gel paste is better than liquid food coloring because it won’t thin out your meringue. Use black for the eyes and mouth. A tiny bit goes a long way.
- White icing pen: For adding highlights to the eyes, if you want them to look spooky-cute.
Ingredient Tips & Substitutions
If you don’t have cornstarch, you can skip it, but the meringues might be slightly more prone to cracking or becoming chewy. For a vegan version, you can use aquafaba (the liquid from a can of chickpeas), but the texture will be different and they may not be as crisp. I stick to egg whites for that classic snap.
Equipment Needed
To make these meringues, you need a few basic tools. You don’t need anything fancy, but having the right equipment makes the process much easier.
- Stand mixer or hand mixer: A stand mixer is ideal because it frees up your hands to add sugar gradually. A hand mixer works too, but it takes more arm strength. Make sure the bowl is completely clean and dry.
- Mixing bowls: Glass or metal bowls are best. Plastic bowls can retain oils, which prevents the egg whites from whipping. I use a large glass bowl for whipping and a smaller one for collecting whites.
- Piping bags: Disposable piping bags are easiest for cleanup. You can also use a reusable silicone bag. Make sure the bag is sturdy enough to handle the pressure of piping.
- Piping tips: A large round tip (like a Wilton 1M or similar) works well for creating the ghost shape. You can also use a star tip for a more textured look.
- Baking sheets: Standard half-sheet pans. Line them with parchment paper or a silicone baking mat. Do not use wax paper; it will melt.
- Spatula: A rubber spatula to scrape down the sides of the bowl and ensure all the sugar is incorporated.
I recommend investing in a good quality mixer. It saves time and effort. Also, keep your bowls pristine. Any trace of grease or yolk will ruin your meringue. Wash them with hot, soapy water and rinse well before use.
Preparation Method
Step 1: Prep Your Station (5 minutes)
Preheat your oven to 200°F (95°C). This low temperature is key. It dries the meringues slowly without browning them. Line your baking sheets with parchment paper. If you don’t have parchment, use a silicone mat. Make sure your egg whites are at room temperature. Take them out of the fridge at least an hour before you start.
Step 2: Whip the Egg Whites (5 minutes)
Place the egg whites in your clean mixing bowl. Add the cream of tartar and a pinch of salt. Start mixing on medium-low speed until the whites become foamy and bubbly. This should take about one minute. You want them to look like wet foam, like shaving cream.
Step 3: Add the Sugar (5-7 minutes)
While the mixer is running on medium speed, slowly pour in the sugar. Do this gradually, about a tablespoon at a time. If you dump it all in at once, it won’t dissolve properly. Once all the sugar is added, increase the speed to medium-high. Whip for about 5-7 minutes, or until stiff, glossy peaks form.
Test for stiffness: Turn the bowl upside down. The meringue should not move. Rub a little between your fingers; it should feel smooth, not gritty. If it feels gritty, keep whipping. The sugar needs to be fully dissolved.
Step 4: Add Flavor and Stabilizer (2 minutes)
Add the vanilla extract and cornstarch. Mix on low speed just until combined. Be careful not to overmix at this stage, or you might deflate the air you’ve whipped in. The mixture should be thick, glossy, and hold its shape perfectly.
Step 5: Pipe the Ghosts (10 minutes)
Transfer the meringue to a piping bag fitted with a large round tip. Pipe the ghosts onto the prepared baking sheets. To make a ghost, pipe a round mound for the body, then a smaller round on top for the head. You can add a little “tail” at the bottom by piping a small line and dragging the tip down. Space them about 2 inches apart, as they don’t spread much.
Step 6: Bake (1.5 – 2 hours)
Place the trays in the oven. Bake for 1.5 to 2 hours. The time depends on the size of your ghosts. They are done when they are dry to the touch and lift off the parchment paper easily. They should still be white. If they start to turn yellow, your oven is too hot. Turn it down slightly.
Step 7: Cool and Decorate
Turn off the oven and leave the meringues inside with the door slightly ajar. Let them cool completely in the oven. This gradual cooling helps prevent cracking. Once cool, use black food gel to pipe on eyes and mouths. Use a toothpick to dab the gel if you want a more artistic look. Let the decorations dry for 10 minutes before serving.
Cooking Tips & Techniques
Avoiding Common Mistakes
The biggest mistake people make is not whipping the meringue long enough. Under-whipped meringues collapse in the oven. Make sure you get those stiff peaks. Another common error is adding sugar too quickly. This prevents it from dissolving, leading to a grainy texture. Add it slowly.
Personal Failure Lesson
I once tried to rush this recipe by turning the oven up to 250°F. The result was a batch of brown, burnt discs. Lesson learned: low and slow is the only way. Patience yields the best results.
Timing and Multitasking
Since the active time is short, use the whipping time to clean up your kitchen. Wipe down the counters, wash the bowls, and organize your piping bags. When the meringues are in the oven, you are free to do other things. Just remember to check them occasionally to ensure they aren’t browning.
Consistency Tips
Humidity is the enemy of meringues. If it’s a rainy day, your meringues might take longer to dry or become chewy. On humid days, I sometimes add a bit more cornstarch to help absorb moisture. Also, make sure your kitchen is dry and well-ventilated.
Ensuring Success
Use fresh eggs. Older eggs separate more easily, but very fresh eggs have tighter membranes, making them harder to separate. I usually use eggs that are a few days old for easier separation. But always, always check for yolk. One drop of yolk will ruin the batch.
Variations & Adaptations
Dietary Variations
For a vegan version, replace the egg whites with 3/4 cup of aquafaba (chickpea liquid). Whip it with cream of tartar and sugar just like regular egg whites. The texture will be slightly less crisp, but still delicious. For a gluten-free option, this recipe is naturally gluten-free, so no changes needed.
Flavor Variations
You can add different flavors to the meringue. Try adding 1 teaspoon of almond extract for a marzipan-like flavor. Or use 1 tablespoon of cocoa powder for chocolate meringues. For a citrus twist, add the zest of one lemon or orange. The possibilities are endless.
Seasonal Adaptations
For Christmas, pipe them into snowman shapes and add red and green details. For Easter, make them into bunny ears or eggs. They are a versatile canvas for any holiday.
Allergen Substitutions
If you have an egg allergy, this recipe is not suitable. Meringues rely on egg whites for structure. There is no direct substitute that replicates the exact texture. However, you can try using commercial egg replacers, though the result will differ.
Personal Variation
I sometimes add a touch of lavender sugar to the meringue for a floral note. It pairs beautifully with the black food gel ghosts, creating a sophisticated and spooky treat. It’s a unique twist that I love.
Serving & Storage Suggestions
Serving Temperature
Serve these meringues at room temperature. They are best enjoyed fresh, but they keep well for up to two weeks.
Presentation
Arrange the ghosts in a clear glass jar for a spooky display. You can also place them on a platter with black napkins and orange accents for a festive Halloween table. They look great scattered around a pumpkin or near a bowl of candy.
Storage Instructions
Store the meringues in an airtight container at room temperature. Keep them away from humidity. If they become soft, you can crisp them up by placing them in a 200°F oven for 10 minutes.
Reheating Tips
You don’t need to reheat them, but if they lose their crunch, a quick bake in the oven will restore their crispness. Just be careful not to burn them.
Flavor Development
The flavor doesn’t change much over time, but the texture might soften if exposed to moisture. For best results, consume them within a week.
Nutritional Information & Benefits
These meringues are primarily sugar and air, so they are high in carbohydrates and low in protein. Each cookie contains approximately 15-20 calories, depending on size. They are naturally gluten-free and dairy-free, making them suitable for those with allergies. However, they are high in sugar, so enjoy them in moderation. The main benefit is the joy they bring, which is essential for mental well-being during the busy holiday season.
Conclusion
Making crispy ghost meringue cookies is a simple yet rewarding Halloween tradition. With just a few ingredients and some patience, you can create spooky treats that are as delicious as they are cute. I love these cookies because they bring a sense of whimsy to my kitchen and delight to everyone who tries them. I encourage you to try this recipe and customize it to your liking. Add your own flavors, shapes, and decorations. Share your creations with friends and family. And don’t forget to leave a comment below with your results. Happy Halloween!
FAQs
Why are my meringues soft?
If your meringues are soft or chewy, they likely weren’t baked long enough or the humidity was too high. Ensure you bake them at a low temperature for a long time, and store them in an airtight container away from moisture.
Can I use egg whites from a carton?
It is not recommended. Fresh egg whites whip better and create a more stable meringue. Carton egg whites often contain preservatives that can prevent proper whipping.
How do I fix weeping meringues?
Weeping occurs when the sugar isn’t fully dissolved. Make sure to whip the meringue until the sugar is completely dissolved and the peaks are stiff and glossy.
Can I make these ahead of time?
Yes, meringues keep well for up to two weeks when stored in an airtight container. They are a great make-ahead treat for Halloween parties.
What if I don’t have a piping bag?
You can use a zip-top bag with a corner cut off as a substitute. It won’t be as precise, but the meringues will still taste great.
Pin This Recipe!
Crispy Ghost Meringue Cookies: Easy Halloween Treats
Delicate, crispy meringue cookies shaped like ghosts, perfect for Halloween. Made with just a few simple ingredients, these treats offer a satisfying snap and melt-in-your-mouth texture.
- Prep Time: 20 minutes
- Cook Time: 1.5 - 2 hours
- Total Time: 2 hours 20 minutes
- Yield: Approximately 12-15 cookies 1x
- Category: Dessert
- Cuisine: American
Ingredients
- 3 large egg whites, room temperature
- 3/4 cup (150g) granulated sugar
- 1 teaspoon cornstarch
- 1/4 teaspoon cream of tartar
- 1/2 teaspoon vanilla extract
- Pinch of fine sea salt
- Black food gel (for decorating)
- White icing pen (optional, for highlights)
Instructions
- Preheat oven to 200°F (95°C). Line baking sheets with parchment paper.
- Place egg whites in a clean, dry glass or metal mixing bowl. Add cream of tartar and salt.
- Whip on medium-low speed until foamy and bubbly (about 1 minute).
- With mixer running on medium speed, slowly add sugar, one tablespoon at a time.
- Increase speed to medium-high and whip for 5-7 minutes until stiff, glossy peaks form. Test by turning bowl upside down; meringue should not move.
- Add vanilla extract and cornstarch. Mix on low speed just until combined.
- Transfer mixture to a piping bag fitted with a large round tip.
- Pipe ghost shapes onto prepared baking sheets, leaving 2 inches between each.
- Bake for 1.5 to 2 hours until dry to the touch and easily lifted from parchment.
- Turn off oven and let meringues cool completely inside with the door slightly ajar.
- Decorate with black food gel for eyes and mouths. Let decorations dry for 10 minutes before serving.
Notes
Ensure all equipment is completely clean and dry, free of grease or yolk, to ensure proper whipping. Egg whites must be at room temperature. Do not rush the baking process; low and slow is key to preventing browning and ensuring crispness. Store in an airtight container away from humidity.
Nutrition
- Serving Size: 1 cookie
- Calories: 18
- Sugar: 4
- Sodium: 5
- Carbohydrates: 4
Keywords: Halloween, meringue, cookies, ghost, crispy, easy dessert, gluten-free, vegan option