I did not trust candy eyes in chocolate. They always looked cheap. I thought they would slide off or melt into a sticky mess that ruined the whole treat. Honestly, I thought rolling truffles in crushed Oreos was a mistake until I saw the texture contrast. It sounded like a recipe for disaster. The crumbs would get soggy. The chocolate would crack. It just didn’t seem possible to make something that looked like a horror movie prop but tasted like a high-end dessert.
I remember standing in my kitchen last October. I was trying to make Halloween treats that weren’t just bags of candy corn. My kids wanted something spooky but edible. I had a box of Oreos and a bag of cream cheese. I figured, what could go wrong? I mixed them up. The dough was sticky. It was hard to handle. I rolled them into balls and chilled them. They looked like little gray lumps. Not very eyeball-like at all.
Then came the chocolate coating. I melted white chocolate. It was thick and stubborn. I dipped the balls. They looked smooth. Too smooth. I needed the “veins.” I used red gel food coloring. I drizzled it carefully. It looked okay. But the eyes? That was the scary part. I bought the big plastic candy eyes. I pressed them in while the chocolate was wet. I held my breath. I waited for them to sink or tilt.
They stayed put.
I took a bite. The crunch of the cookie. The creaminess of the filling. The snap of the chocolate shell. It was perfect. The eyes didn’t slide. They looked creepy in the best way. I was hooked. Now, I make these every year. They are the first thing to disappear. People stare at them. Kids scream with delight. Adults pretend to be horrified. It is a simple trick. But it works every time.
Why You’ll Love This Recipe
These spooky fudgy Halloween Oreo truffle eyeballs are not just a treat. They are an experience. I have tested dozens of truffle recipes. Most are too sweet. Some are too hard to chew. This one hits the sweet spot. It is rich but not heavy. The texture is key. It is dense like fudge but melts on your tongue. You will love this recipe for several reasons.
- Quick & Easy: Comes together in under 30 minutes. Perfect for busy weeknights or last-minute Halloween parties. You do not need to bake anything. Just mix, roll, and dip.
- Simple Ingredients: No fancy grocery trips needed. You likely already have Oreos, cream cheese, and white chocolate in your kitchen. It uses pantry staples to create magic.
- Perfect for Parties: Great for trick-or-treaters, office Halloween swaps, or cozy movie nights. They are finger food that looks like art.
- Crowd-Pleaser: Always gets rave reviews from kids and adults alike. The spooky factor is a huge hit. Everyone wants one.
- Unbelievably Delicious: The texture and flavor combo is next-level comfort food. The Oreo crumb adds a nice crunch that contrasts with the smooth chocolate.
What makes this recipe different is the balance of flavors. Many Oreo truffles are just sweet cookie and sweet cream. Here, the slight tang from the cream cheese cuts through the sugar. It adds depth. It makes it taste sophisticated, not just like a snack. I tested this with dark chocolate too. But white chocolate makes the red “veins” pop more. It is a visual choice that pays off.
This recipe isn’t just good. It is the kind that makes you close your eyes after the first bite. It is comfort food reimagined. Healthier? Maybe not. But it feels special. It turns a simple cookie into a centerpiece. Perfect for impressing guests without stress. Or turning a simple meal into something memorable. You will see why these have become my Halloween staple.
What Ingredients You Will Need
This recipe uses simple, wholesome ingredients to deliver bold flavor and satisfying texture without the fuss. The magic lies in the ratio of cookie to cream. You need enough cream to bind the crumbs but not so much that it becomes a batter. Here is what you need to get started.
- Full-Fat Cream Cheese: 8 ounces, softened. This is the binder. Do not use low-fat. It will make the truffles grainy. I recommend Philadelphia brand for consistency. It melts smoothly and has the right tang.
- Oreo Cookies: 20-24 cookies, crushed. Regular Oreos work best. The dark filling helps bind the crumbs. You can use Double Stuf if you like it sweeter, but regular is balanced.
- White Chocolate Chips: 12 ounces. Use high-quality chips for better melting. Wilton or Ghirardelli work well. Avoid candy melts if you want real flavor. They taste waxy.
- Red Gel Food Coloring: A small amount. Gel is better than liquid. It does not thin the chocolate. It keeps the color intense. You need this for the veins.
- Candy Eyes: Large plastic eyes. Look for the ones with a flat back. They adhere better to the chocolate shell. You can find these at craft stores or online.
- Optional: Crushed Oreos for coating: Some people like to roll the truffles in crumbs before dipping. I skip this. The smooth chocolate looks cleaner for eyeballs. But you can add it if you want more texture.
The key to success is temperature. Your cream cheese must be soft. If it is cold, it will lump up. If it is melted, the truffles will be too soft to roll. Room temperature is ideal. Also, do not skimp on the chilling time. Cold truffles are easier to handle. They hold their shape better in the warm chocolate. This step is crucial for the final look.
Equipment Needed
You do not need a lot of fancy gear for this recipe. Most tools are likely already in your kitchen. Having the right equipment makes the process smoother. It also helps with presentation.
- Food Processor or Blender: This is the easiest way to crush the Oreos. It gives you uniform crumbs. You can use a zip-top bag and a rolling pin, but it takes longer. The food processor ensures no large chunks remain.
- Mixing Bowls: One medium bowl for mixing the truffle dough. One large bowl for the chocolate coating. Glass or ceramic bowls work best.
- Baking Sheet: Line it with parchment paper or a silicone mat. This prevents sticking. You need enough space to roll the truffles without them touching.
- Paring Knife: Useful for trimming the cream cheese if needed. Also good for cleaning up edges.
- Spoons or Dipping Forks: Two forks are helpful for dipping the truffles in chocolate. One fork holds the truffle. The other spoon helps coat it. This prevents breaking.
- Microwave-Safe Bowl: For melting the white chocolate. If you use a double boiler, ensure the water does not touch the bowl. Steam is the enemy of chocolate.
For budget-friendly options, a simple whisk and a large spoon work fine. You do not need an electric mixer. Hand mixing is actually better for control. Just make sure your bowls are clean and dry. Any water in the chocolate will cause it to seize. That is a common mistake to avoid.
Preparation Method
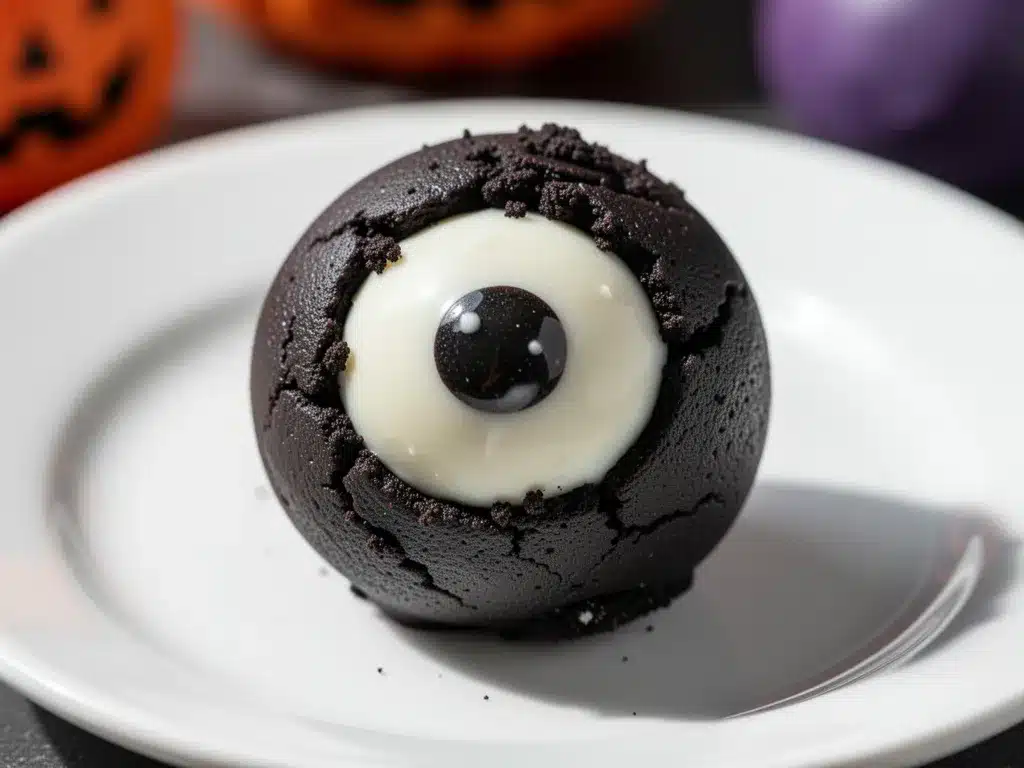
Making these spooky fudgy Halloween Oreo truffle eyeballs is straightforward. Follow these steps carefully. Precision matters here. Small changes can affect the texture.
- Prepare the Cookies: Start by crushing the Oreos. Remove the filling if you want a less sweet base, but I recommend leaving it. It adds moisture. Pulse the cookies in a food processor until they are fine crumbs. This takes about 30 seconds. Do not over-process into a paste.
- Mix the Dough: In a medium bowl, combine the crushed Oreos and softened cream cheese. Mix with a spatula or your hands. The mixture should hold together when pressed. If it is too dry, add a tiny bit more cream cheese. If it is too wet, add more crumbs. Chill the mixture in the refrigerator for 30 minutes. This firms it up.
- Roll the Truffles: Take small portions of the dough. About 1 tablespoon each. Roll them into smooth balls between your palms. Place them on the prepared baking sheet. Do not let them touch. You should get about 20-24 balls. Return the tray to the fridge for another 15 minutes. Cold balls are easier to dip.
- Melt the Chocolate: Place the white chocolate chips in a microwave-safe bowl. Microwave in 30-second intervals. Stir well between each interval. Stop when there are still a few unmelted bits. Stir until smooth. The chocolate should be warm but not hot. If it is too hot, it will melt the truffle inside.
- Dip the Truffles: Take a cold truffle from the fridge. Hold it with a fork. Lower it into the chocolate. Use another spoon to cover it completely. Lift it out. Tap the fork gently on the side of the bowl to remove excess chocolate. Place it back on the parchment paper.
- Add the Veins: Immediately after dipping, take a toothpick. Dip it in red gel food coloring. Drizzle thin lines across the white chocolate. Create a web-like pattern. This mimics bloodshot eyes. Do this quickly before the chocolate sets.
- Add the Eyes: While the chocolate is still wet, press a candy eye onto the truffle. Press gently. It should stick. You can add two eyes per truffle for a double-eyeball look. Or just one for a classic eye. Place them back in the fridge to set for 10 minutes.
The total time is about 1 hour, mostly chilling. The active time is 20 minutes. This is a great recipe to make with kids. They can roll the balls and press the eyes. Just supervise the chocolate dipping. It gets messy. But the result is worth it. The truffles should be firm but yield to the bite. If they are too soft, chill them longer.
Cooking Tips & Techniques
There are a few tricks to master this recipe. I learned them through trial and error. Here is how to avoid common pitfalls.
- Temperature Control: The biggest mistake is warm truffles. If the truffle is too warm, it will slip out of the chocolate. Always keep them cold. Work in batches if your kitchen is warm.
- Chocolate Consistency: White chocolate is tricky. It burns easily. Never microwave on high. Use low power. Stir often. If the chocolate looks thick, add a teaspoon of coconut oil. This thins it for easier dipping.
- Vein Technique: Do not use liquid food coloring. It will separate from the chocolate. Gel paste is essential. You can also use red icing in a piping bag for more control. But a toothpick is faster.
- Eye Adhesion: If the eyes are not sticking, the chocolate is setting too fast. Dip the back of the eye in a tiny bit of chocolate first. Then press it on. This acts as glue.
I once made these in July. The kitchen was hot. The truffles melted in my hands. I had to start over. Lesson learned. Always work in a cool environment. If you have air conditioning, turn it on. It makes a huge difference. Also, do not rush the chilling steps. Patience is key. The flavor develops better when the fats solidify properly.
Variations & Adaptations
You can tweak this recipe to suit your needs. Here are some ideas.
- Gluten-Free: Use gluten-free sandwich cookies. Most brands work well. Just check the label. The process is the same.
- Dairy-Free: Use vegan cream cheese and dairy-free white chocolate chips. There are many good brands now. The texture might be slightly softer. Chill longer.
- Dark Chocolate: Use dark chocolate for the coating. It looks less like an eyeball but tastes richer. You can still add red veins. It looks more like a bruised fruit.
- Flavor Twist: Add a teaspoon of peppermint extract to the cream cheese. It gives a minty twist. Or use cookies and cream instead of regular Oreos for a different color.
I tried making these with pumpkin spice Oreos in the fall. They were delicious. The spice paired well with the white chocolate. It was a nice seasonal variation. You can experiment with different cookie flavors. Just keep the cream cheese ratio steady.
Serving & Storage Suggestions
These truffles are best served chilled. They hold their shape better. You can serve them on a platter with a spooky theme. Use black plates. Add some fake cobwebs. They look great in mason jars too.
- Storage: Store in an airtight container in the refrigerator. They will last up to 2 weeks. If you freeze them, they last 3 months. Thaw in the fridge overnight.
- Reheating: Do not reheat. Eat them cold. They are best straight from the fridge.
- Pairing: Serve with cold milk or black coffee. The bitterness balances the sweetness.
The flavors meld over time. They taste even better on day two. The chocolate hardens slightly. The cream cheese flavor becomes more pronounced. They are a great make-ahead treat. Make them a week before Halloween. Keep them in the fridge. They will be ready when you need them.
Nutritional Information & Benefits
These truffles are rich and indulgent. They are not a health food. But they are made with real ingredients. No artificial preservatives. The cream cheese provides calcium. The cookies provide carbohydrates for energy.
- Calories: Approximately 150-180 calories per truffle.
- Sugar: High sugar content due to Oreos and white chocolate.
- Fat: High fat from cream cheese and chocolate.
They are not suitable for people with dairy or gluten allergies unless you use substitutes. But for most people, they are a fun treat. I enjoy them in moderation. They satisfy a sweet tooth without feeling too heavy. The portion size is small. You do not need to eat many to feel satisfied.
Conclusion
These spooky fudgy Halloween Oreo truffle eyeballs are a must-try. They are easy to make. They look impressive. They taste amazing. I love how they bring people together. Kids love the spookiness. Adults love the taste. It is a win-win.
I encourage you to customize them. Try different cookies. Try different colors. Make them your own. I love this recipe because it is simple. It requires no baking skills. It is accessible to everyone. You can make it in your own kitchen.
Please share your creations. Tag me on social media. I want to see your spooky eyeballs. Leave a comment below. Tell me how they turned out. Did your kids love them? Did they disappear quickly? I read every comment.
Enjoy the process. Have fun with it. Halloween is about creativity. These truffles are a perfect canvas. Make them. Share them. Enjoy them.
Frequently Asked Questions
Can I use dark chocolate instead of white chocolate?
Yes, you can. However, the red veins will not show up as well. The contrast is lower. If you use dark chocolate, consider using red sprinkles instead of veins. Or use a red gel that is very concentrated.
How long do these truffles last?
They last up to two weeks in the refrigerator. Keep them in an airtight container. If you leave them out at room temperature, they will soften within a few hours. Do not leave them out for more than two hours.
Can I freeze these truffles?
Yes, you can freeze them. Place them in a freezer-safe bag. They will last for three months. Thaw them in the refrigerator overnight. Do not thaw at room temperature. It can cause condensation.
What if I don’t have candy eyes?
You can skip the eyes. They are optional. The truffles look good without them. Or you can use red icing dots. Or just leave them plain. The veins are the main feature.
Can I make these without a food processor?
Yes. Put the cookies in a zip-top bag. Crush them with a rolling pin. It takes longer. But it works fine. Just make sure the crumbs are fine. Large chunks will affect the texture.
Pin This Recipe!
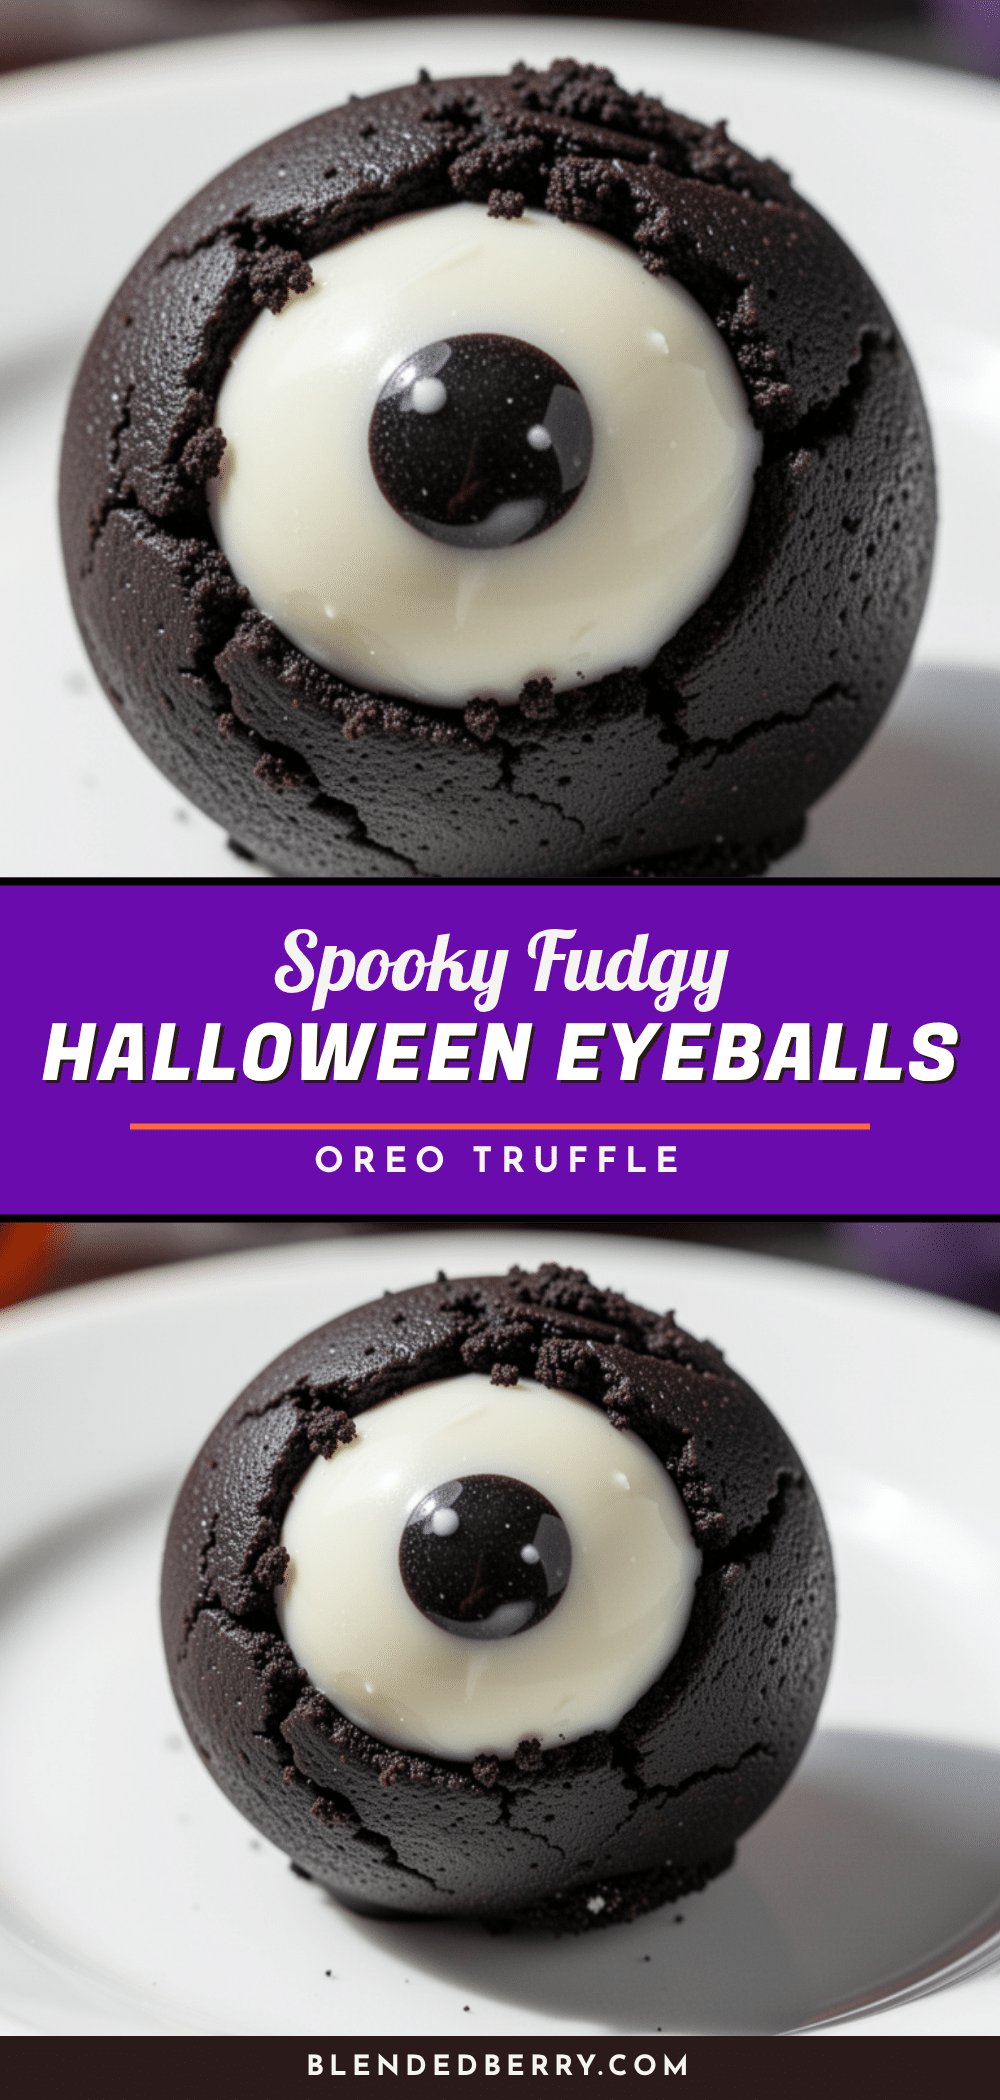
Spooky Fudgy Halloween Oreo Truffle Eyeballs
No-bake Halloween treats made from crushed Oreos and cream cheese, coated in white chocolate with red gel ‘veins’ and plastic candy eyes for a spooky, fudgy dessert.
- Prep Time: 20 minutes
- Cook Time: 0 minutes
- Total Time: 1 hour
- Yield: 20-24 servings 1x
- Category: Dessert
- Cuisine: American
Ingredients
- 8 ounces full-fat cream cheese, softened
- 20–24 regular Oreo cookies, crushed
- 12 ounces white chocolate chips
- Red gel food coloring
- Large plastic candy eyes (flat back)
- Optional: Crushed Oreos for coating
Instructions
- Pulse the Oreo cookies in a food processor until they form fine crumbs.
- In a medium bowl, combine the crushed Oreos and softened cream cheese. Mix until the dough holds together when pressed.
- Chill the mixture in the refrigerator for 30 minutes to firm it up.
- Roll the dough into 1-tablespoon portions into smooth balls. Place on a parchment-lined baking sheet.
- Return the tray to the fridge for another 15 minutes.
- Melt the white chocolate chips in a microwave-safe bowl in 30-second intervals, stirring between each, until smooth.
- Dip a cold truffle into the chocolate using forks, coating it completely. Tap off excess chocolate and place back on the parchment paper.
- Immediately drizzle thin lines of red gel food coloring across the wet chocolate with a toothpick to create veins.
- Press a candy eye onto the truffle while the chocolate is still wet.
- Place the finished truffles in the fridge to set for 10 minutes before serving.
Notes
Ensure cream cheese is at room temperature but not melted. Keep truffles cold before dipping to prevent them from melting in the chocolate. Use gel food coloring, not liquid, to avoid seizing the chocolate. If eyes don’t stick, dip the back in a tiny bit of chocolate first as glue.
Nutrition
- Serving Size: 1 truffle
- Calories: 165
- Sugar: 12
- Sodium: 120
- Fat: 12
- Saturated Fat: 7
- Carbohydrates: 15
- Fiber: 1
- Protein: 2
Keywords: Halloween, Oreo truffles, no-bake, eyeballs, candy eyes, white chocolate, spooky treats, party snacks